


Bee Easy Drawing 2025
Bee Easy Drawing 2025
Bee Easy Drawing 2025
 Hey there! Could you please share the full article you’d like me to rewrite? The snippet you provided just has a name and a date, and I need the complete text to give you a polished, human‑written version. Thanks!
 Just like bees build their hives one tiny cell at a time, learning to draw these buzzy little creatures happens step by step. Drawing bees might seem as tricky as catching one without getting stung, but I promise it’s much safer and simpler!
Think of your pencil as the worker bee and your hand as the queen, giving directions for creating something sweet and wonderful on paper. You don’t need the skills of a master artist or fancy tools, just like a bee doesn’t need anything special to make honey, just its natural gifts.
In this guide, you’ll see how even the most basic sketching skills can bloom into charming bee drawings that will have your friends saying, “How did you do that?”
How to Draw a Realistic Bee
How to Draw Your Own Buzzing Bumble Bee
Ever thought a bee might be a bit too tricky for your sketchbook? Think again! With a handful of simple steps, you can turn that fluttering insect into a charming doodle that’ll have everyone saying, “Aww, look at that honey‑combed cutie!”
Step 1 – Gather Your Tools
- broad‑grip pencil (for quick sketch lines)
- aluminum or colored pencils for those bold black & yellow stripes
- eraser (just in case you over‑imagine the wing span)
Step 2 – Sketch the Body in Two Snapshots
Start with the main section: imagine a skinny abdomen that’s longer than a ladybug. For the head, draw a small oval with two big, friendly eyes. The legs are short but wide—two sets on each side, like a bumble bee’s dancing feet.
Tip: Keep the shape zany
Don’t be afraid to exaggerate—it’s all about personality. A slightly chubby belly makes for good “brand‑new” looks.
Step 3 – Make It Fly with Some Angel‑Wings
- Draw two simple, feathered shapes on either side. They’ll give that essential “flying” vibe.
- Finish the wings with faint lines, as if the bee just gave a quick swipe in the breeze.
Step 4 – Add the Signature Stripes
Wrap the body in your classic black and yellow pattern. Be bold—just one color per stripe is enough to make your bee stand out on a page.
Pro Trick
Use a ruler to keep the stripes evenly spaced—otherwise you might end up with a “crazy color collage.”
Step 5 – Bring It to Life!
Give your bee a huge, happy grin or those tiny “bee‑hands.” Then add a little “honey pot” silhouette in the background for extra charm. Finish with a fine‑line pen for a crisp look and a splash of color to keep it laughing.
Final Word
Now you’ve got a bee that’s ready to break the “not‑so‑ordinary.” Next time someone asks, “What does your boss look like?” you can say, “He’s a buzzing, colorful little bee—super friendly yet full of work!”
1. Start with the Head
How to Sketch a Sweet Bee Head
Let’s dive into the fun of drawing a bee’s head—step by step and with a sprinkle of whimsy.
1. Start with the Core
- Place the center of the bee’s head right in the middle of your paper, so it feels balanced and ready for a whirlwind of colors.
2. Craft the Rainbow “U”
- Create a smooth, rainbow‑like line shaped like an upside‑down “U”. Think of it as a gentle arch that will become the upper part of the head.
- Let the colors flow—use a spectrum that feels playful, from soft pastels to bold brights.
3. Add the Bee’s Signature Features
- Gently shade in a pair of cute, expressive eyes.
- Draw the typical bee antennae, curling outward in a casual, almost mischievous vibe.
4. Final Touches
- Enhance the outline with a light, confident stroke—don’t overdo it—so the bee looks lively.
- Feel free to tweak the colors anything you love—this is your masterpiece after all!
And there you go—your bee head is ready to jump into a buzzing cartoon world. Have fun and keep that creative buzz alive!
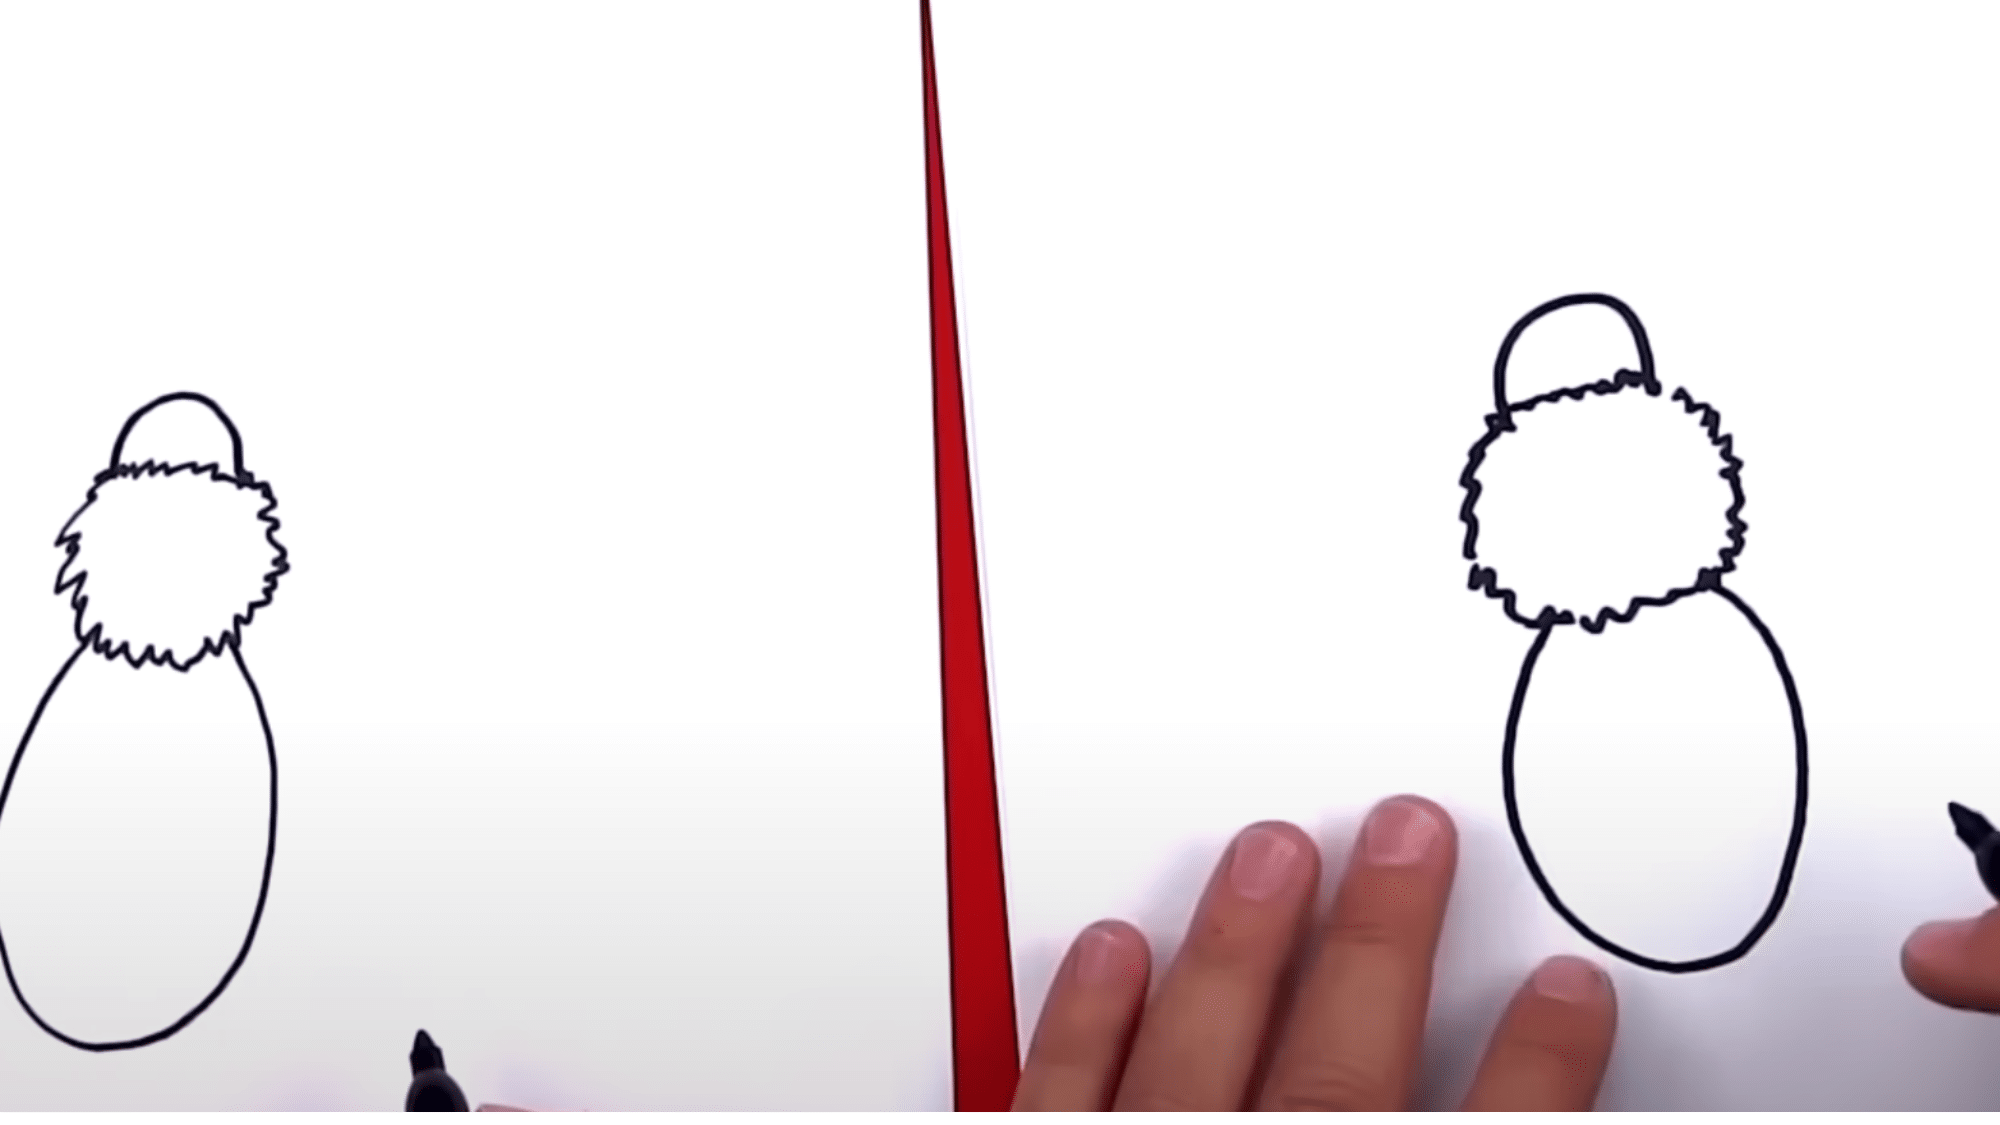
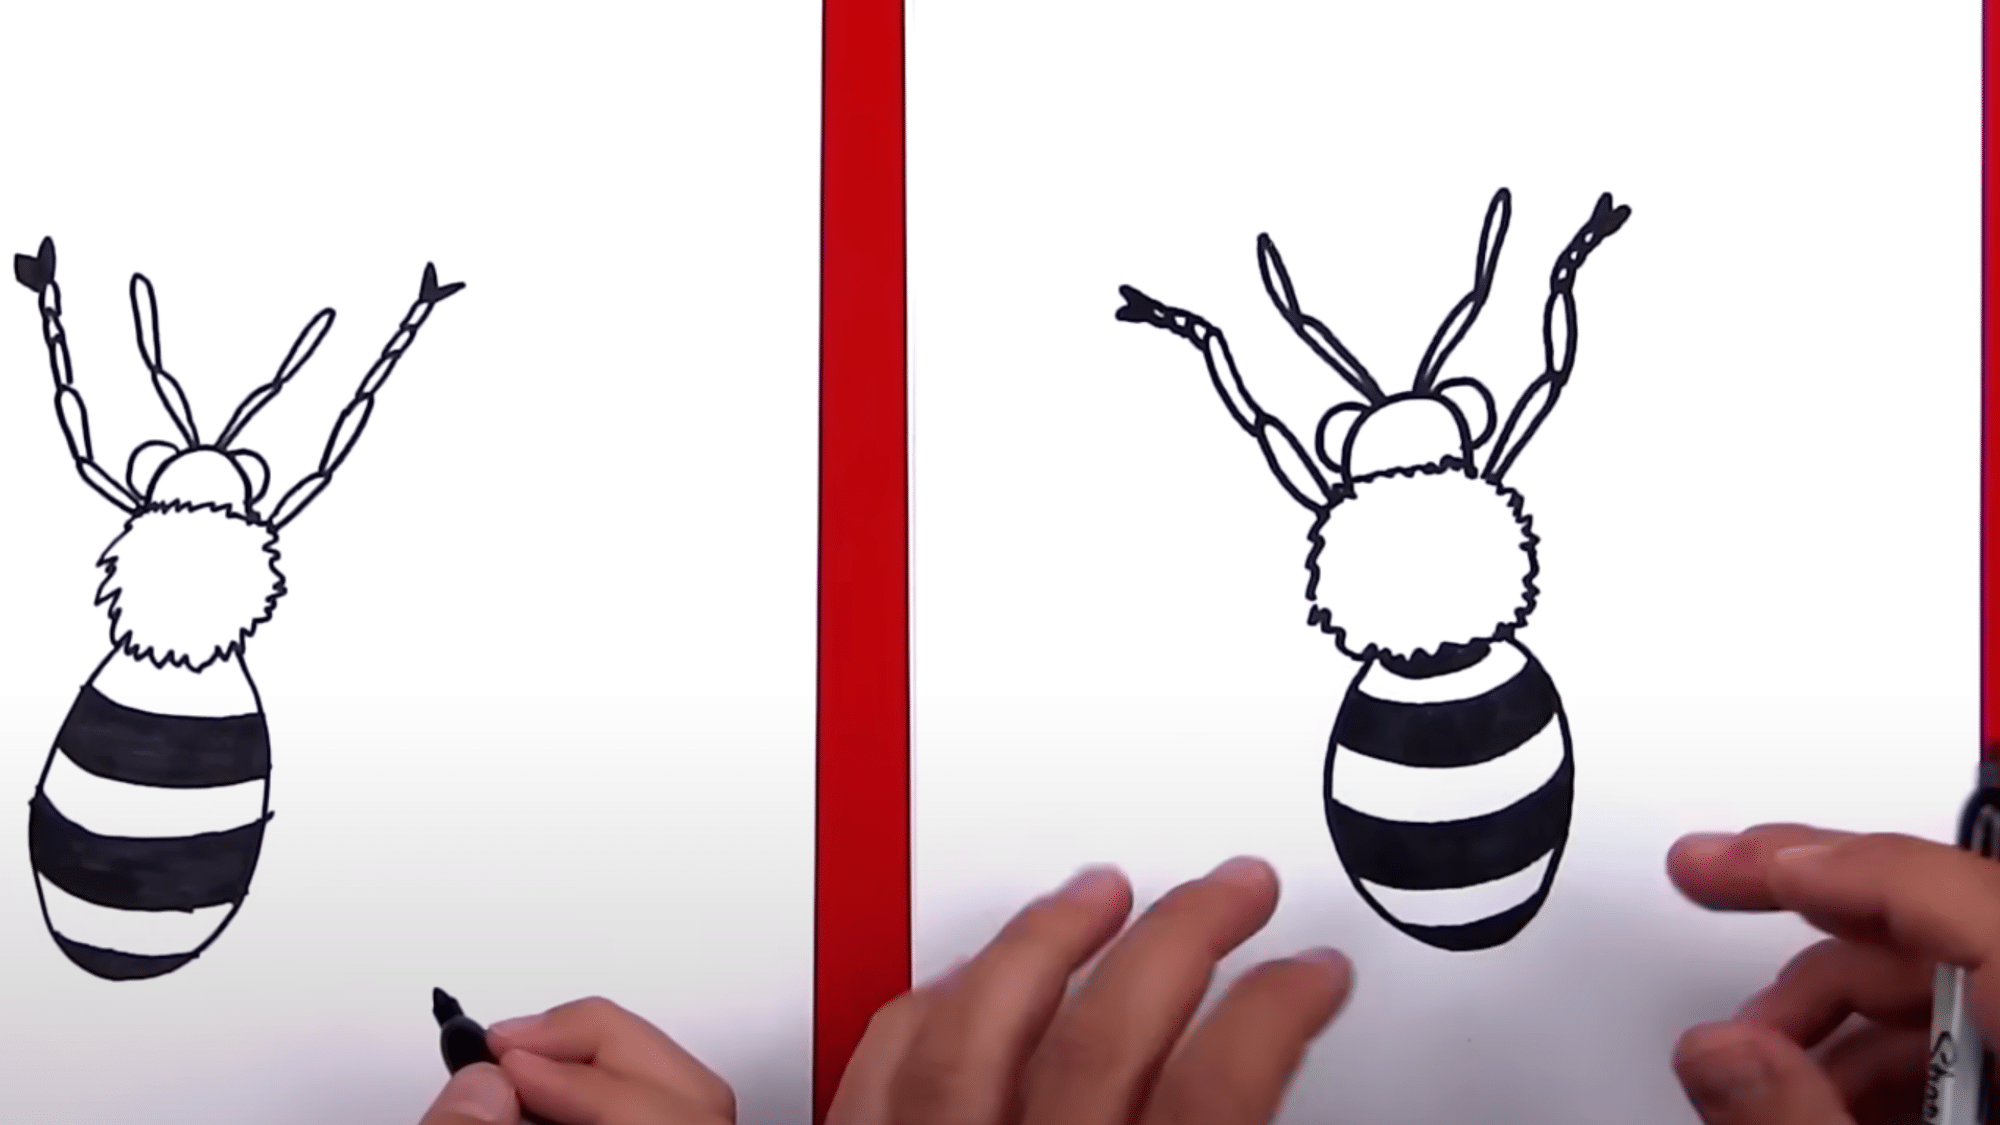
2. Draw the Thorax
 Next, draw the thorax, the middle part of the bee’s body. Use a zigzag line around the body to create the fuzzy texture typical of a bee’s thorax.
3. Create the Abdomen
 Now sketch the abdomen. This is the large, oval-shaped part of the bee’s body. It should curve outward and then inward, giving the bee its characteristic rounded shape.
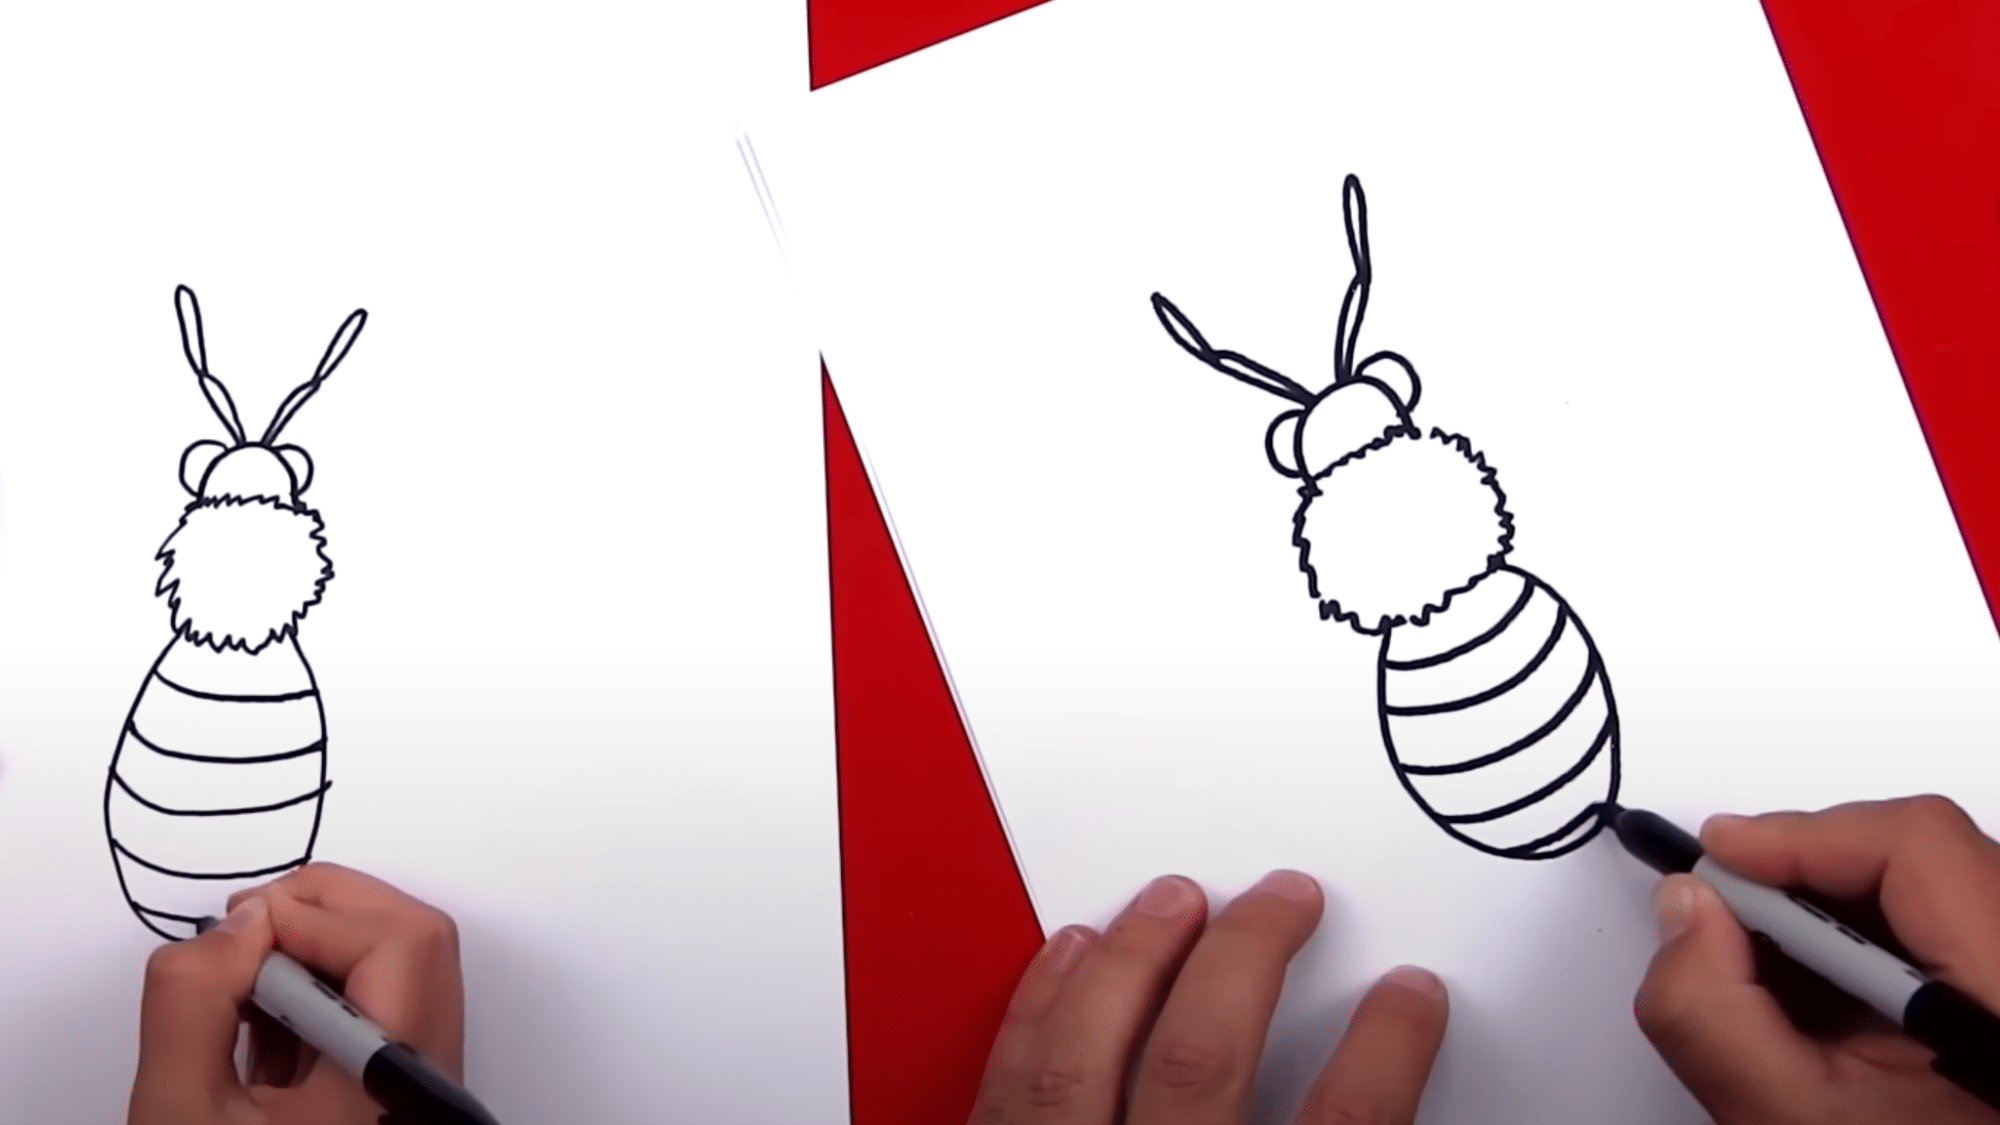
4. Add the Eyes and Antennas
Crafting a Charming Bee Sketch
Ready to bring your tiny honeybee to life? Let’s dive in with a few simple, fun steps!
- Glimmering Eyes: Sketch two C‑shaped curves on each side of the head. Think of them as cheerful, floating windows that capture the bee’s curious gaze.
- Stylish Antennae: From the very top of the head, add two slender antennae. Curate them like a gentle wave, swooping out before curling back in—just how a real bee’s antennæ relax after a buzzing stroll.
And voilà! Your bee’s entrance boasts playful eyes and elegant antennae, complete with the natural charm of a buzzing insect. Happy sketching!
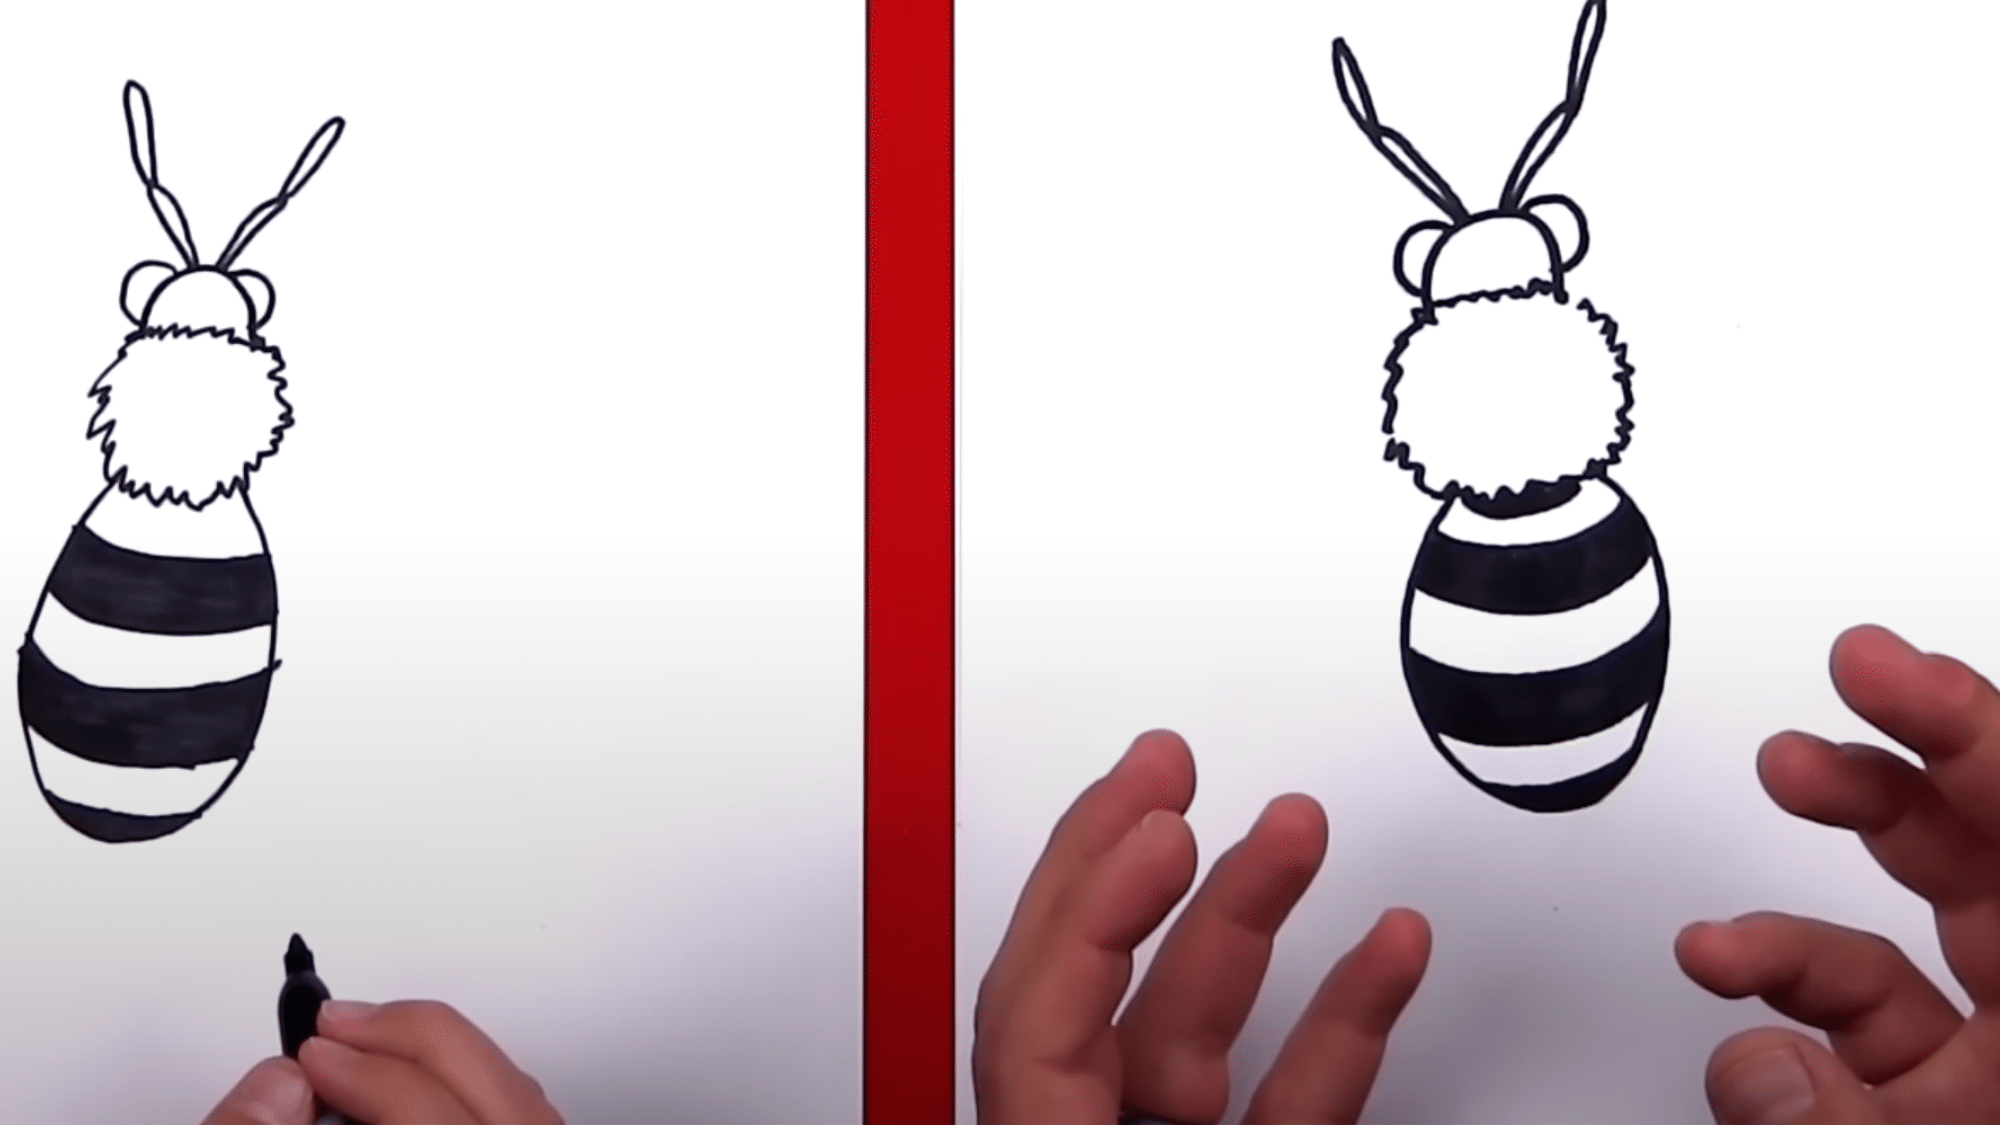
5. Draw the Stripes
Drawing a Bee With Stripes That Pop!
Think of a bee as a tiny yellow jacket with a built‑in fashion statement. Want to give your bee that classic striped look but make it look 3D? Let’s get creative with some curved lines!
Why Curved Stripes Shine
Straight lines feel flat. Curved lines give depth, just like a 3‑D model. By keeping every stripe’s curve in the same direction, you trick the eye into seeing the abdomen roll like a cinnamon roll.
Your Materials
- Sketchpad or paper
- Pencil, pen, or a nice marker
- Optional: Light box for aligning curves
Step‑by‑Step Guide
1. Outline the Bee
Draw a simple oval for the head, a round body below it, and attach a few lines for the legs. Keep it loose—this is just the foundation.
2. Plan Your Stripes
Position the stripes where you’d like them on the abdomen. Typical bees have about four or five stripes. Keep a little extra space between each for that classic polka‑dot feel.
3. Sketch the First Stripe
Start at the top of the abdomen. Draw a gentle curve that sweeps to the bottom, staying on the same side (let’s say left‑to‑right). Remember: the curve is what gives the 3‑D effect.
4. Repeat With a Twist
For each next stripe, mirror the same curvature direction. Don’t let the lines cross or twist differently—consistency is key!
5. Polish While Leaving Space
Thicken the lines once the pattern feels solid. Keep a half‑centimetre gap between each stripe so your bee looks symmetrical and neat.
Extra Fun Hack
Visualize your bee in a half‑worked black‑and‑white sketch before shading. This quick “preview” can help you spot crooked curves early.
Optional Final Touches
- Shade each stripe as if the light comes from one side—this adds a real 3‑D vibe.
- Give the bee shiny spots on its belly for a finished look.
And there you have it! A stripe‑bursting bee that drips with depth. Grab your pencils and let the colorful wings of imagination fly.
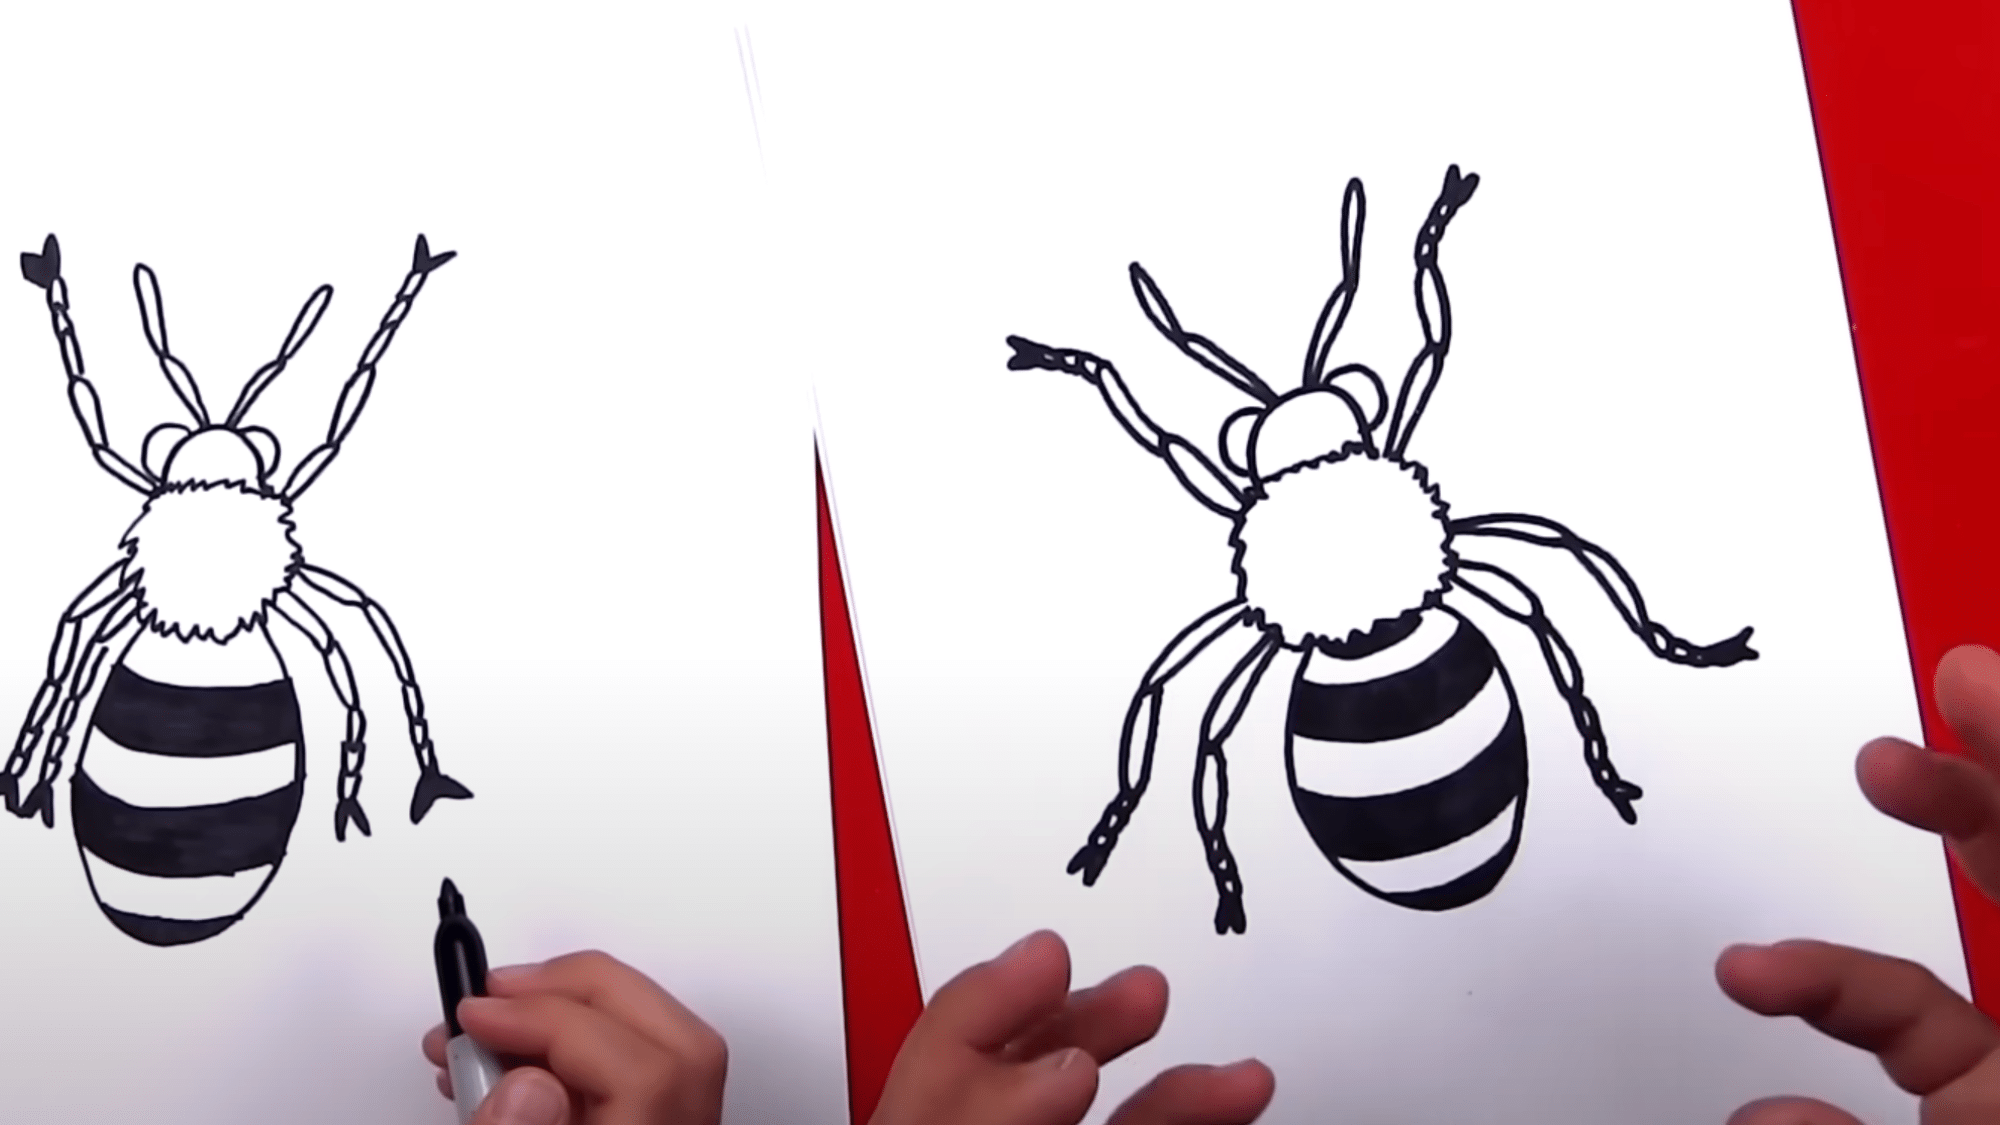
6. Sketch the Legs
How to Build the Legendary Bee
Ever wondered how to bring a bee to life with just a few strokes? Grab your cuttle‑pen and let’s sculpt this stinger‑inspired superstar!
Step 1 – The Antennas & Front Legs
- Start with two eye‑catching antennas (they’re the bee’s “do‑you‑feel-nice” signals). Use the same sleek, curved shape you love for your antenna lines.
- Right below each antenna, draw a sturdy front leg. Keep the shape symmetrical; after all, bees love balance!
Step 2 – The Midsection Groove
Now it’s time to add the middle “body” groove. This segment will connect your front legs with the rest of the bee’s anatomy. Think of it as the epicenter of the buzzing party.
Step 3 – Six Little Movers on the Sides
- Mirroring each side, add three smaller legs. Bold yet graceful, they’ll glide the bee around the garden.
- Remember to keep them in proportion: a little longer than your ant-like legs but still playful.
Step 4 – The “M” Toe Trick
Every good bee knows about “M” toes:
- At the tip of each leg, sketch a tiny M shape—no, not a banana—just a stylized “M.” It’s the secret recipe to keep your bee’s feet looking sharp.
Final Touches
Add a few tiny wings, a happy face, and voilà—your bee is ready to flutter in the digital skies. Don’t forget to sprinkle a little humor and keep it friendly; after all, bees are nature’s real-life comedians!
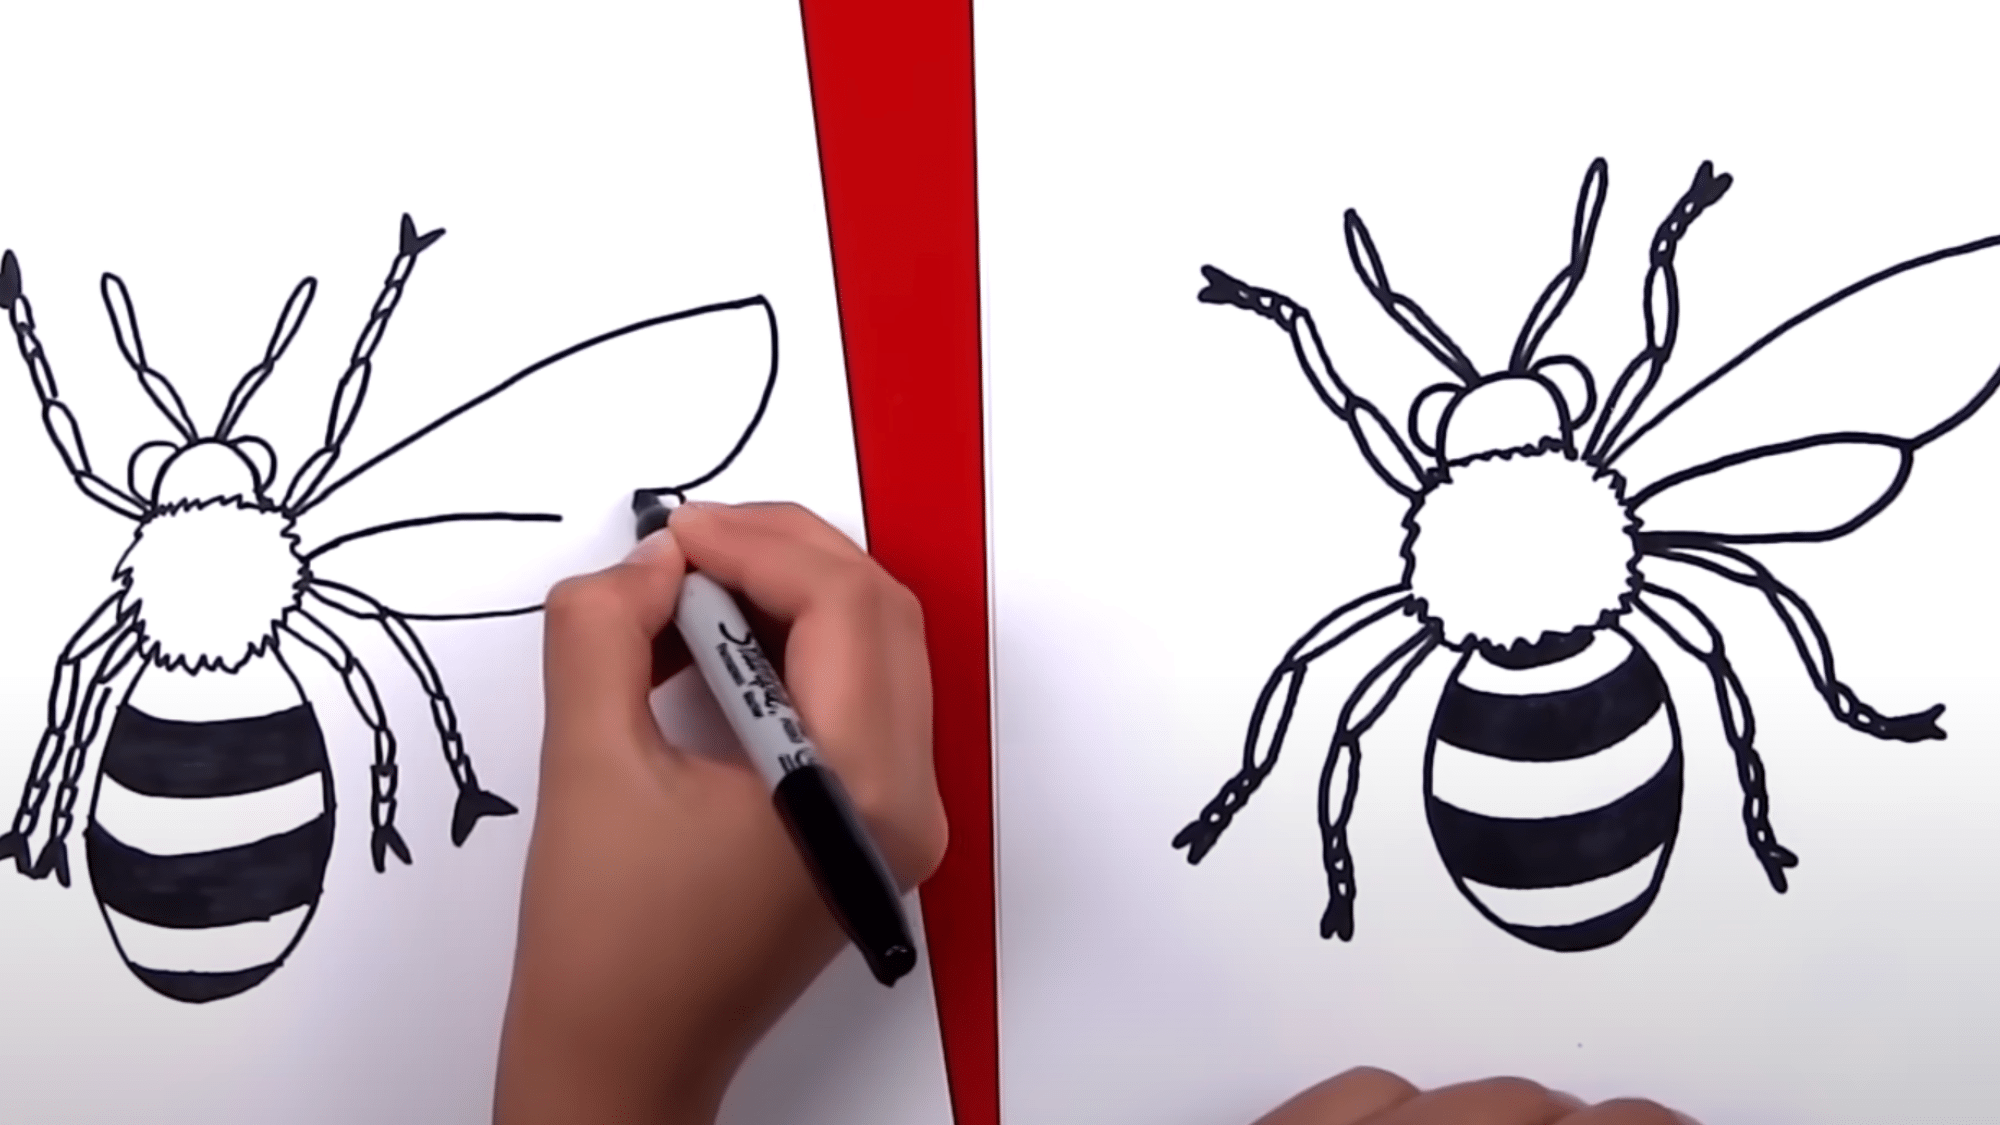
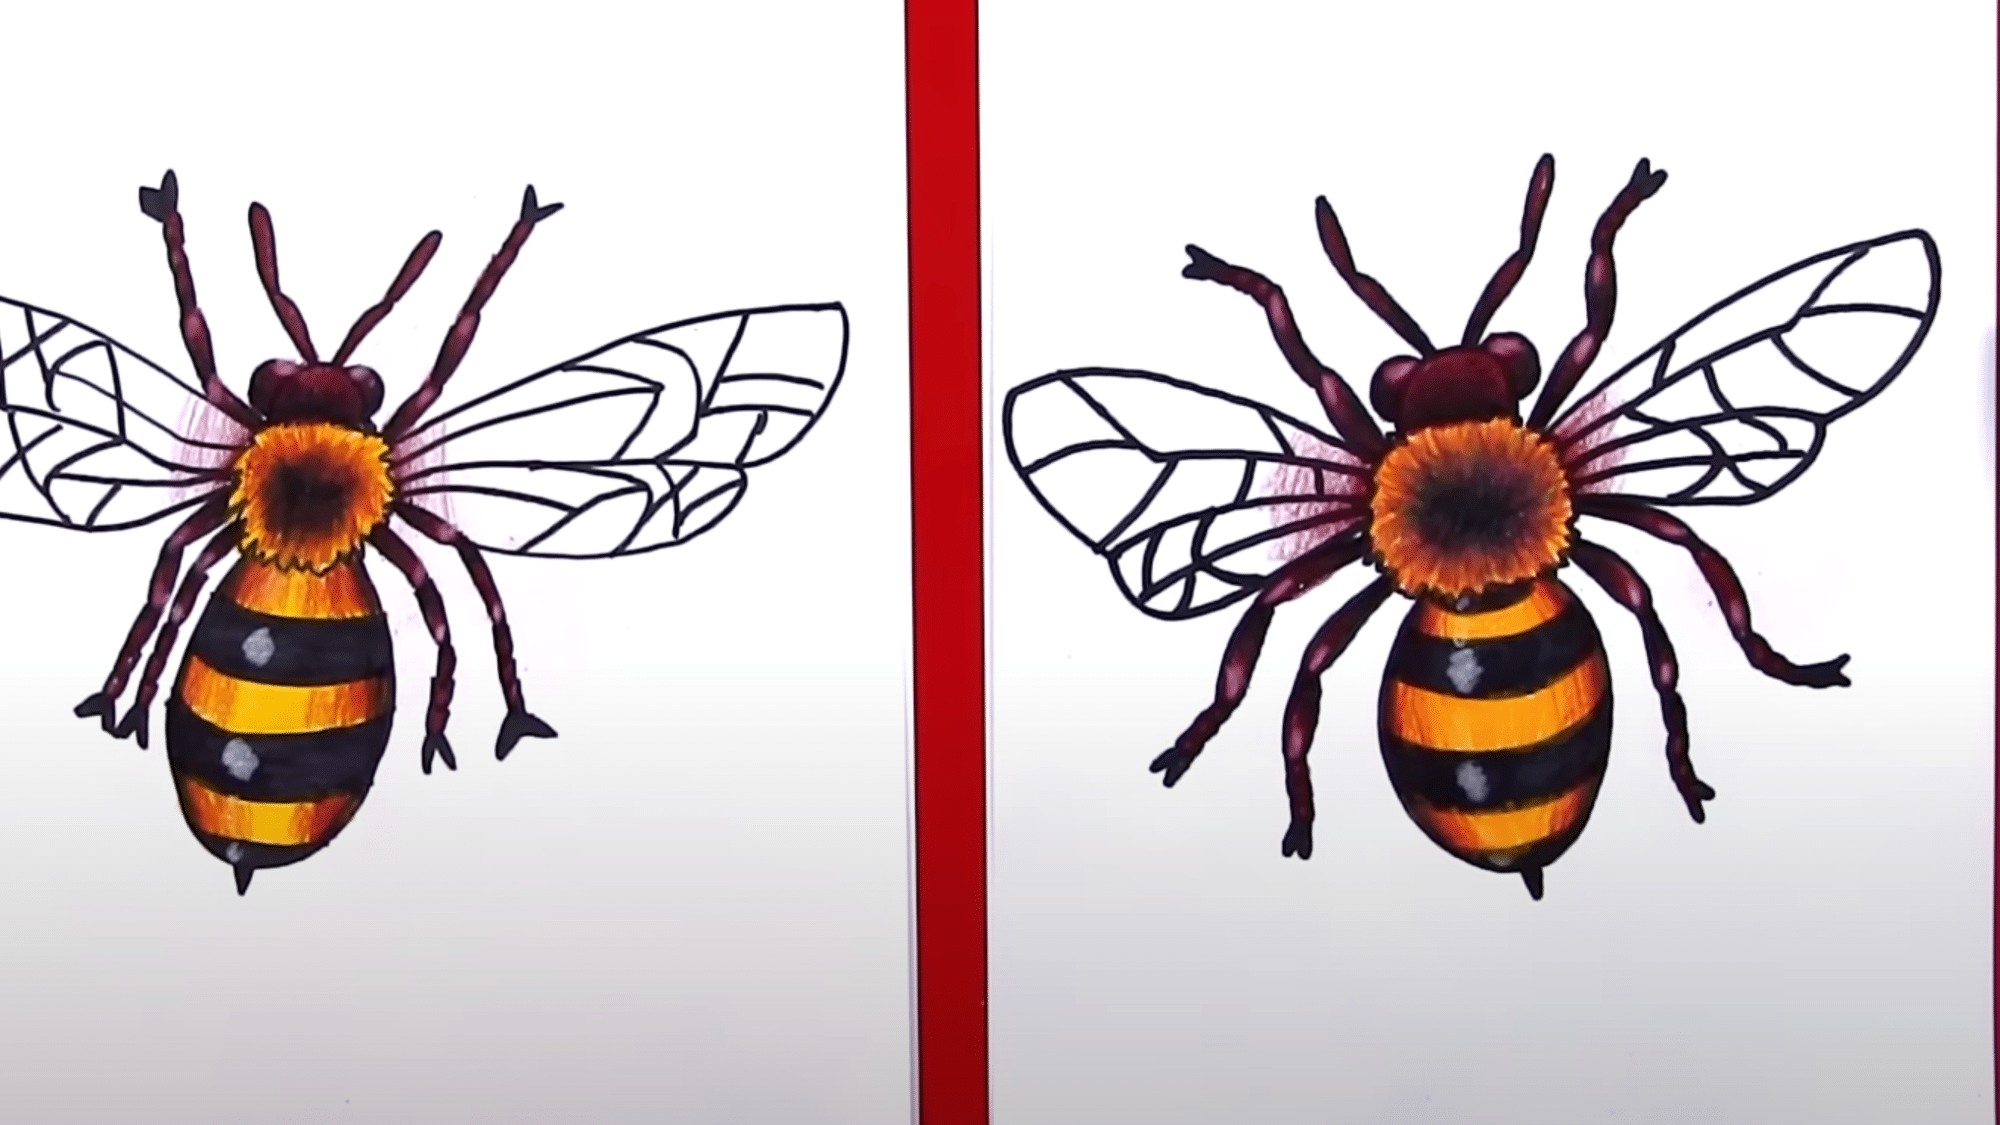
7. Draw the Wings
 For the wings, start by drawing a curved line extending from the body. Create two bumps in the middle of the line and bring it back to the bee’s body. Repeat this on the other side, drawing the second wing to match the first.
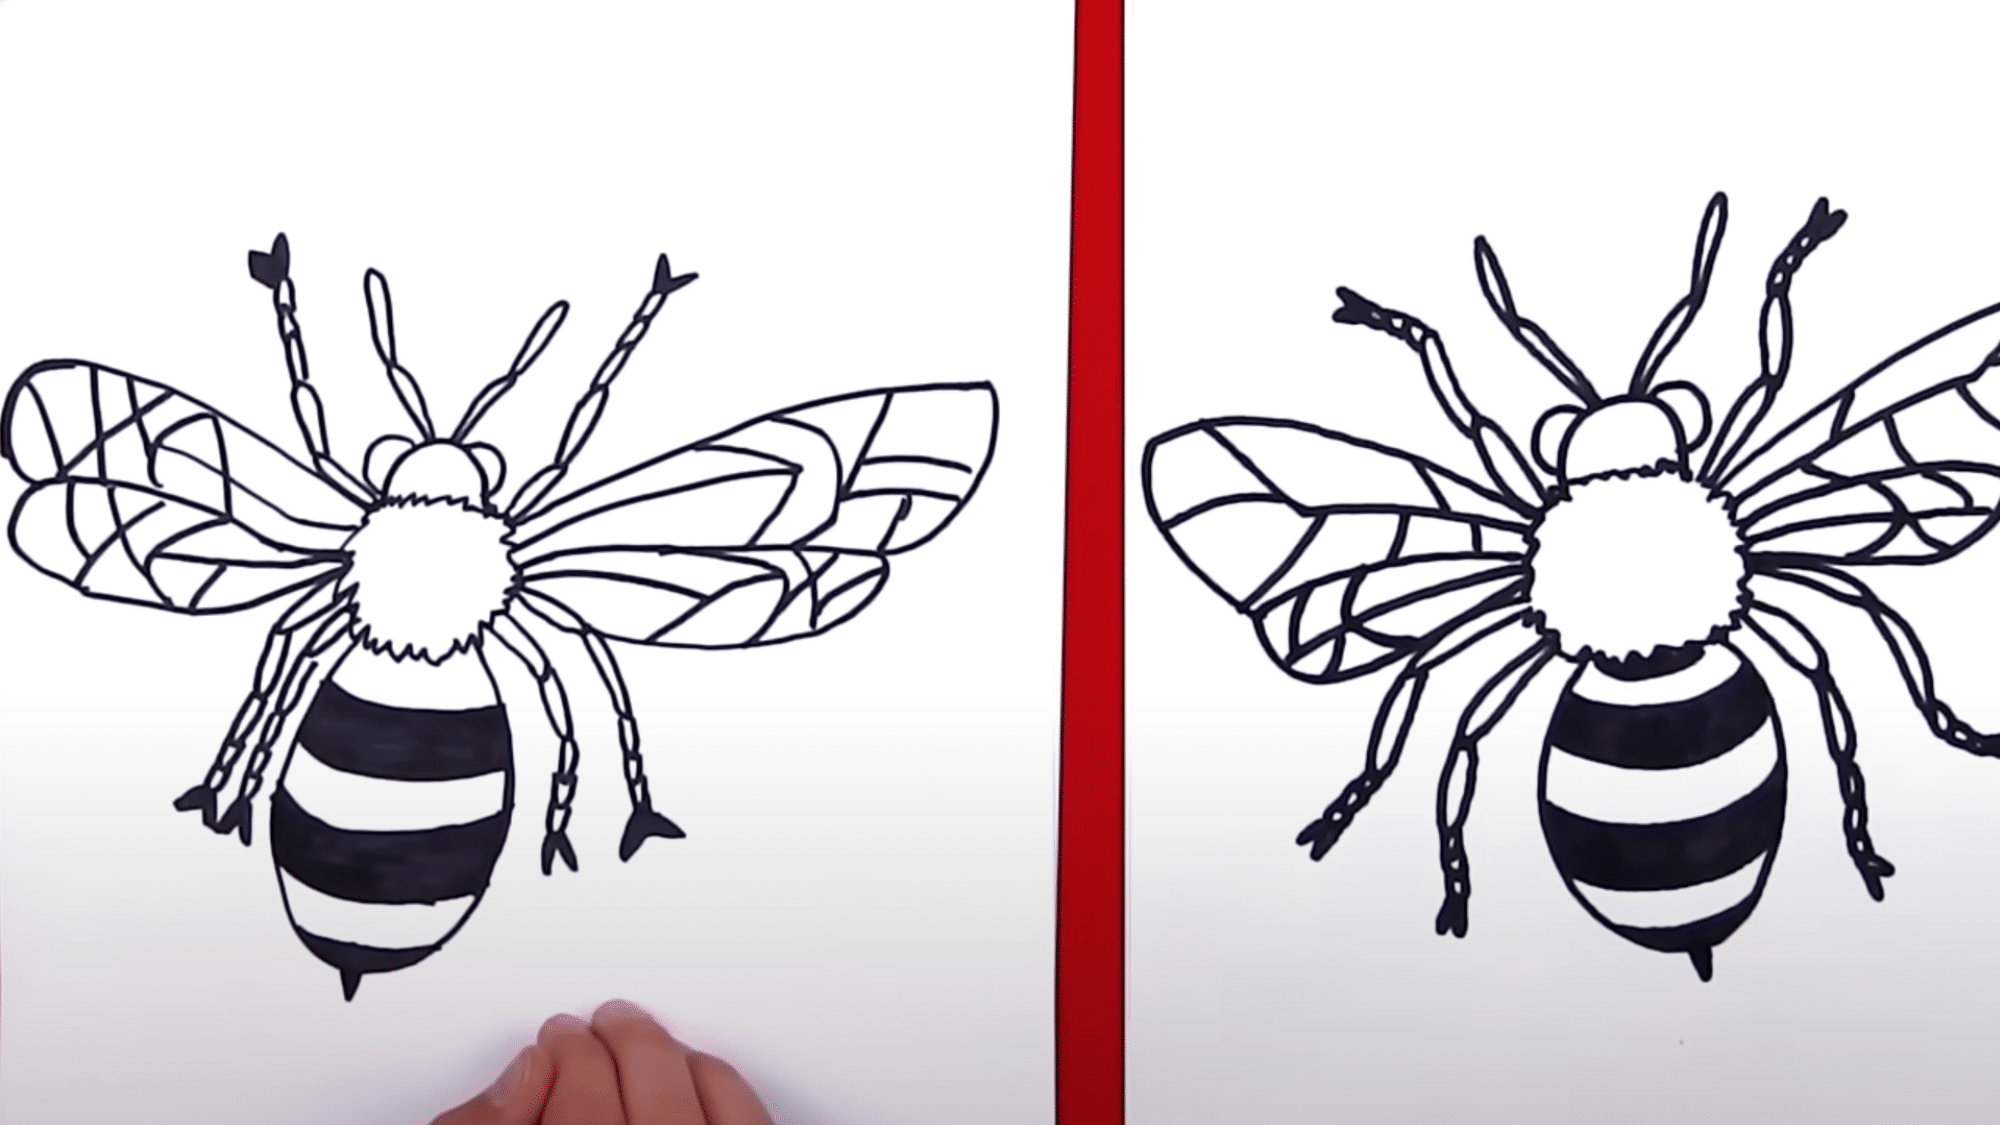
8. Finish with the Stinger
Finish the Bee-Whirly Stinger!
Once you’ve sketched the mighty buzzster’s body, it’s time to let the sting do its thing.
Step 1: The Tiny Vaster
- Draw a little “V” shape at the very bottom of the abdomen—think of it as the bee’s superhero cape.
- Make it short, snappy, and perfectly aligned with the tail of the abdomen.
Step 2: Add That Bee‑Juice Finish
Grab your shading tools (think of them like bee‑butterflies) and add depth to the outline.
Pop in a few darker spots to give the stinger a sense of weight, and sprinkle some lighter highlights to show that the honey‑slick beetle’s skin is shimmering under the sun.
Pro Tips for a Real‑Talk Bee
- Use a pencil or pen that fades, just like a bee’s flipper strokes.
- Keep the lines thin and airy so the stinger doesn’t feel like it’s carrying a heavy backpack.
- If you’re feeling adventurous, add a tiny antenna or a flick of a buzz at the stinger’s tip for extra personality.
And there you have it! Your bee is now ready to spin from flower to flower—stinger and all.
Tips to Avoid While Drawing a Bee
Here, you can see eight common mistakes to avoid when drawing realistic bees. These tips will help you create more accurate bee illustrations.
1. Don’t Ignore Basic Bee Anatomy: Many artists draw bees with just two body sections. Bees actually have three main parts: head, thorax, and abdomen. Ensure that you include all three sections with the correct proportions for a realistic drawing.
2. Bees have two pairs of wings that look different: The front wings are larger than the back wings. When at rest, these wings fold over one another. Drawing all wings the same size and shape makes your bee look fake.
3. Don’t Make Legs Too Simple: Bee legs are complex, not just simple sticks. Each leg has joints and special structures. The back legs of honey bees have pollen baskets.
Drawing basic straight legs will make your bee look cartoon-like rather than real.
4. Skip Perfect Stripes: Real bees don’t have perfectly even black and yellow stripes. Different bee species have unique patterns.
Some have fuzzy bands, others have dots or patches. Study the specific bee type you want to draw instead of using the classic cartoon pattern.
5. Don’t Forget the Fuzz: A common mistake is drawing bees with smooth bodies. Most bees are fuzzy, with hair covering parts of their bodies.
This fuzz is important for collecting pollen. Add texture to show this hairiness for a more lifelike bee.
6. Avoid Oversized Stingers: Many artists draw huge, prominent stingers. In reality, bee stingers are small and often hidden from view unless being used.
Drawing an oversized stinger makes your bee look less natural.
7. Don’t Draw Identical Eyes: Bees have compound eyes and simple eyes. The compound eyes are large and located on the sides of the head, while simple eyes (ocelli) are three small dots on top of the head. Drawing just two simple round eyes will make your bee look wrong.
8. Avoid Incorrect Color Choices: While yellow and black are common bee colors, using bright, crayon-yellow or jet-black isn’t accurate. Real bees have more subtle shades, amber, golden, brown, or even blue-black.
Pointers to Make a Bee Look Lifelike
1. Add Hair Texture
How to Make Your Bee Look Like the Real Thing
Ever notice how real bees look like tiny, fuzzy coats? That fluff isn’t a uniform blanket – it’s a carefully crafted gradient.
Key Spots to Focus On
- Thorax (the middle section): this is where the fuzz really shows, thick and warm like a cozy sweater.
- Abdomen: the fluff here is lighter, almost whisper‑soft, letting your bee feel graceful.
Painting Tips
Use small, light strokes to mimic that velvety texture. Think of it like painting with cotton candy – a delicate touch that gives your bee life.
By paying attention to these tiny differences, you’ll make the difference between a cartoon butterfly and a lifelike buzz that’s truly buzzing with charm.
2. Show Natural Posture
Bees rarely sit perfectly straight. When drawing, position the legs in a natural stance, with some touching the surface and others slightly raised. The antennae should curve gently rather than stick straight out.
3. Include Wing Transparency
Bee wings are clear with visible veins. Draw the wings with light, thin lines and add the vein pattern. The wings should look see-through, not solid.
When a bee is at rest, the wings fold along the body rather than sticking out. This subtle detail makes a big difference in how real your bee looks.
4. Pay Attention to Color Variation
The Quirky Hue of Bees
Think you just know bees as the classic yellow-and-black combo, and then you’re in for a surprise! Buzz! These little flying artists are more about subtle swatches than stark stripes. Let’s peel back the layers of their color story.
1⃣ What Looks Like “Yellow” Is Actually a Whole Palette
- Amber‑ish tones often dominate what we driftingly call “yellow.” Picture a warm, sun‑kissed morning.
- Sometimes it leans into golden highlights, giving the bee a little sparkle.
- Warmer hues prevail when they’re basking or prepping for a hot afternoon.
2⃣ The “Black” That’s Not Black at All
- On closer inspection, those dark sections pick up brownish undertones—think rich chocolate.
- Some even sport a curious bluish tint, especially near the wing tips or when the sunlight glint changes the game’s mood.
- In short, they’re more plaid than monochrome.
3⃣ Keep It Real, Keep It Natural
When describing or painting a bee, you should mix shades instead of using flat, uniform colors. A little gradient here and there makes the scene feel alive and authentic—no kid‑drawn simplicity.
Takeaway
The next time you spot a busy honeybee, stop at it for a moment. You’ll notice the gentle swirl of amber, the subtle brown and that unexpected brushstroke of blue. Even in plain appearance, nature keeps a secret color menu—just enough to keep it interesting!
5. Draw Realistic Eyes
Bee Eye Wonderland
The Magnificent Compound Eyes
Bees pack thousands of tiny lenses into those huge, side‑mounted eyes. Think of it like a miniaturized Mural that’s actually a living sensor array. When you look, you’re peering through a subtle texture or pattern that tells you just how many miniature glasses hide up there. It’s not just eyes; it’s a whole optical playground.
The Miniature Ocelli
- Three tiny, simple eyes positioned smack on top of the bee’s head – acting like a rudder and compass for flight.
- They’re lightweight but super sharp, helping the bee keep its course and detect light intensity.
- Imagine them as the bee’s built‑in ‘eyeballs’ for sky navigation – no GPS needed!
6. Show Proper Scale
Size matters when drawing bees. If you include flowers or other objects in your drawing, make sure the bee is the right size compared to them.
Most bees are between 1/4 to 1 inch long. Drawing a bee too large or too small compared to its surroundings will instantly make it look less real.
In a Nutshell
Drawing bees that look real isn’t as hard as it seems. By avoiding common mistakes like wrong body parts, smooth bodies, and cartoon-like stripes, you’ll be on the right track.
Remember to add fuzzy texture, draw see-through wings with veins, and pay attention to the right colors.
The small details matter most – how the bee stands, its complex eyes, and the right body size in relation to flowers. Real bees have three body sections, two types of eyes, and six jointed legs.
Next time you draw a bee, take a few minutes to look at actual bee photos first. This simple step will help you notice the tiny details that bring your drawing to life.
With practice and these tips in mind, your bees will soon appear to be buzzing right off the page.
X


