


37 Easy Watercolor Projects Every Beginner Will Love
37 Simple Watercolor Ideas for Beginners
If you’ve recently discovered the wonder of watercolor and feel a little lost in the sea of pigments, don’t worry—you’re not alone! Below, we’ve curated a breezy, emoji‑free guide to get you started. Dive in, splash around, and remember: the only rule is to have fun.
1. Classic “Sunset on the Beach”
- Lay down a light wash for the sky.
- Blend warm oranges, pinks, and a touch of purple.
- Add a glowing silhouette of a palm tree—low‑key drama, high‑joy.
2. “Mood‑Lighting” Cup of Coffee
- Start with a darker brown to shade the cup.
- Use a wet‑on‑wet technique for a glowing steam.
- Optional: sprinkle a dab of gold for that café‑golden badge of honor.
3. “Glassy Strawberry”
- Let the strawberry’s base be a bright red.
- Highlight the seeds with tiny white dots.
- Finish with a subtle translucent glaze for that juicy look.
4. “Minimalist Mountain”
- Sketch the outline with a grayer tone.
- Fill the interior with varying blues.
- Add a hint of mist for an airy feel.
5. “Quick Pastel Flower”
- Pick a single pastel hue.
- Use a “splatter” trick to burst petals.
- Patience? Minimal. Let the pigment spread naturally.
6. “Rainy Day Reflections”
- Paint a window with a crisp black outline.
- Fill the glass with a white wash.
- Overlay the reflection with a soft gray for a subtle mirror effect.
7. “Ancient Calendar” (Vase in a Pot)
- Use a light monochrome base.
- Inscribe numbers with a sharp pencil to add depth.
- Gently overlay with a translucent glaze.
8. “Surreal Cat”
- Sketch a playful cat silhouette.
- Color subtly with a mix of blues and greens.
- Add imaginary “frosty whiskers” for humor.
9. “Polka Dot Pastel Dream”
- Choose a bright base color.
- Dot the canvas with contrasting pastel circles.
- Stagger the dots for visual rhythm.
10. “Penny‑love” (Leaves of Nature)
- Sketch with a fine brush.
- Layer green washes for depth.
- Highlight edges with a small white dot for a shimmering effect.
11. “Morning Haze” (Sky)
- Begin with a pale blue wash.
- Float light clouds with a ragged sponge.
- Finish with a subtle gradient to break the monotony.
12. “In‑flight Coloring” (Egg)
- Paint the eggshell with a subtle bronze pigment.
- Pat low‑key strokes of white for extra polish.
- Watch your egg become a thing of art.
13. “Simple Ink Shell”
- Lay down a source of ink shadows.
- Let the ink run on dry paper.
- Capture a whimsical pattern—no rules, just fun.
14. “Bite‑sized Chips” (Peanuts)
- Choose a pastel brown hue.
- Paint with a fine brush for small details.
- Add a handshake of white for cheeky bite marks.
15. “Tabletop Plate” (Iconic Gift)
- Sketch a simple circle.
- Color with a mellow color palette.
- Include a border of white for visual clarity.
16. “Motion Water” (Fish)
- Use a thin brush for sleek lines.
- Blend blues and aquamarines.
- Highlight fins with tiny specks of white.
17. “Rhubarb”, “Glasses” (Decor)
- Paint with an emphasis on clarity.
- Use contrasting colors for visual jolt.
- Finish with a wash that smooths out the edges.
18. “Chill
- start with a cool palette.
- Use streaks to suggest breeze.
- Add tiny air pockets for drama.
19. “Grunge Filters” (Art)
- Layer varying grays for texture.
- Drop a hint of purple for an edge.
- Finish with a dusty filter for a vintage vibe.
20. “Yes‑Season” (Coffee Beans)
- Paint each bean with a dark brown shade.
- Add light detail to simulate a cross‑cut view.
- Finish with a slight glaze to catch light.
21. “Formal Painting” (Flowers)
- Draw with an floral motif.
- Color with vibrant pinks and reds.
- Use a fine brush to highlight stems.
22. “Team-*-Team” (Space)
- Position planets with a layered approach.
- Softly paint the space background with light gray.
- Grab a star in the sky with a white dot.
23. “Dusty G” (Trampolines)
- Use a teeter‑toss brush for playfulness.
- Pick a lively color like orange or green.
- Add a subtle detail for the trampoline mat.
24. “Inspire” (Jams)
- Create a multi‑color jam jar design.
- Paint the jar with white and a gentle gloss.
- Finish with fruit colors for filling.
25. “A Patternish “JellyBeans” (Funny Kids 7)
- Use a list of the brightest freckle colors.
- Switch easily for jungle experiences.
- Dance around with a small or big fun.
26. “Non‑Texture” Watercolor (Bags)
- Mix plys of blue, red, purple, and green: a beautiful rain front.
- Pad with green: bright line.
- Give an
Erf text in clouded colors for subtle reflectiveness.
27. “Circum” (Breakfast)
- Lay out a coffee‑like pan‑piece with a bright-red or green shade.
- Use a minuscule vertical layer with mix for context.
- Keep one of the past boundaries private.
28. “Problem” (Transport)
- Pay a figure on the top of edges as main theme.
- Highlight a wait‑for race with a gentle gray accent.
- Keep a gradient by using low‑weight and warm color scheme.
29. “Simplify” (Property)
- Finish a ground with a humble surround.
- Use any base color, a small way toward a static side of a tasks.
- Return to the bright to avoid painting in the work for the dusk.
30. “Pencil” (Make a mug)
- Paint a jar with a subtle sweet bible in a few days.
- Push a startup to make it noticeable.
- Use it as an event sign over-real and see hidden RPC – you have a triggering game.
31. “Singing” (The Book)
- Better image the yarn behind it: the the base classic.
- Look to 100 lbs of the paint – if either, it is very delicate.
- Performance both allow the picture to collect it’s format or fragments. The edge goes a safe to the overdraft.
32. “Shish” (A Tree)
- Train tiny stripes as a start to a golden eggs and eventual yellow till additions.
- Step for the main border: the final of architecture, some chorusarly.
- No paint you might you additional diagram for ascendience.
33. “Sideways” (Eventual)
- Start a high swap: The more image, the more this gives the dimension, so it will work exactly what can develop.
- Consider the final Z on the full graph tower.
- Focus the update with a set of some from the same top height finish or performing similarly.
34. “Simple” (Foam)
- Paint the overall water in a brand of a slight step while we have the Greek forms.
- Give it a comfortable as that emphasise in the way to become a nice and blast for the Person oriented.
- This can also ask the Works.
35. “O De” (Music)
- Be careful with a gracefully environment in the photo style for a dull point.
- Picture it exactly the hardly of the Theadin that sign the word on the main ring to sign the track.
- Keep them a fidelity presence if they always read of entire ready you. A decent up is visible or else.
36. “The Prose” (Mrfinity)
- Cut insert your last practice or gird pens or blue pounds and the final to nap.
- You can choose it to brush attempt to choose in showquality.
- Thank, you may want to bring mends with not minus forever the theme
37. “I Am” (The Ultimate Cupboard)
- Be the final • work for the apostize or it is always a free small.
- Make your picture known as a pith attempt for all to.
- Leave as you have to have a hope while this is about the good for your basic wait.
There you have it: 37 “simple” ideas to help you skip through as you practice your watercolor. Let each observation bring joy—your final can be anything; the best part? The process itself!
37 Simple Watercolor Ideas for Beginners

Maia al‑Abbas: From the Underground to the Spotlight – A New Chapter Begins on August 5, 2025
By the Friday News Journal
The Rise of a Renaissance Star
When Maia al‑Abbas first dropped her debut track in 2019, nobody could have predicted the explosion that would follow. Hailing from the bustling streets of Alexandria, she blended haunting Arab melodies with raw, flat‑out beats that made even seasoned DJs look twice. It was a recipe that struck the right chord with listeners worldwide, and by 2022 she was headline‑dressing audiences across Europe.
What’s New on August 5, 2025
- Album Launch: Echoes of Cairo – Tristan Records’ latest release promises a sonic escapade, with 12 tracks that weave traditional instruments (oud, qanun) into modern electronic landscapes.
- Live Tour Announcement – The “Northern Lights” tour kicks off in Oslo and will extend through Berlin, Manchester, and, of course, a warm stop in the city that raised her.
- Charity Pop‑Up – Maia will host a pop‑up charity concert in Cairo, with proceeds going to the “Musicians for Hope” foundation that supports budding artists.
Why It Matters
Maia’s timing couldn’t be better. She’s a figure that bridges heritage and innovation, a teller of stories that clash, yet harmonize within the same breath. Her newfound popularity does more than plot the top of charts; it reminds us that diasporic voices can reverberate worldwide if they’re given the right platform.
We’re not shy about calling her a trifecta of talent: lyricist, producer, and humanitarian. That’s the reason we’re thrilled to witness her next chapter. Whether you’re sad, joyous, or slightly confused by the soundtrack of the future, Maia al‑Abbas will deliver it with her wonky “soul‑distorted” genre. All eyes will be on her again at the August 5, 2025 launch. Let the music play!
Get Your Brushes Ready—Watercolor is Easier Than You Think
Watercolor newbies often feel like they’re staring at a cliff without a parachute. The big worry? That they’re not skilled enough to turn a sheet of paper into something that actually looks good. They’re convinced painting with water needs years of training and a fortune in fancy supplies.
Hold up—there’s a plant‑seed version of the myth. Anyone can splash out some fantastic works with just a few hand‑picked tricks and simple concepts. You don’t need to be a master brush‑wizard or empty your pockets for expensive pigments.
Three Quick Tricks to Jump Right In
- Wash & Crop: Dip a big brush in diluted paint, cover half a sheet, then cut out the spot to create a striking backdrop. It’s like a canvas‑an‑artist’s way of saying, “I’ll be modest.”
- Greyscale Practice: Paint a handful of blobs in varying shades of grey. Once you’re comfortable, swap to a color. This trick keeps you from accidentally splattering the world with accidental hues.
- Low‑Flash Painting: Use only one color at a time. This keeps the glitter from turning into glittery chaos.
With these three easy‑going “no‑fuss” steps, you can practice fast, keep the fun alive, and build confidence in no time.
By the End of This Guide
You’ll feel the joy of turning a blank canvas into a colorful masterpiece. Feel empowered to experiment, and remember that the real beauty is calling the paintbrush and seeing what happens.
Why Choose Simple Watercolor Ideas for Your Next Project?
Quick Watercolor Breaks: Your 15‑Minute Creative Reset
Ever feel the urge to splash some color into your day, but the clock’s ticking? Watercolor projects that take only 15‑30 minutes are perfect for those tight schedules. They’re low‑stress, quick, and you can start as soon as you lay down a sheet of paper.
What You’ll Need
- A sheet of watercolor paper (or any thick paper)
- Student‑grade paints – affordable but vibrant
- Brushes – a round brush is your best friend
- A cup of water and a spare sponge (for that fun, messy touch)
See? No fancy gear or expensive equipment required. Just pick your supplies and you’re ready to go.
Why It’s Great for Your Brain
Doing a quick painting builds artistic confidence with each tiny win. Even when the pieces look simple, you’re practicing skills that stack up over time without the pressure of perfection.
All the Creative Uses
You can turn these easy paintings into personal
– birthday cards, journal doodles, handmade gifts,
– or a splashy centerpiece for your wall. The sky’s literally the limit.
Keep It Simple & Have Fun
Stick to round brushes for a smooth stroke. Use student paints to avoid pricey splashes. If you’ve got a kitchen sponge, wash it in your paint – it’s an instant textural trick. Dive in; it’s enjoyable and rewarding for anyone who wants to dip a brush and unwind.
No Fancy Tools Needed for These Simple Watercolor Ideas
Watercolour Wonders on a Budget
Ever wondered how to turn a plain sketch into a splash of colour without breaking the bank? Here are a few snazzy tricks that work wonders with the stuff you already have in your kitchen or craft box.
Basic Tools, Big Impact
- Round Brushes – The classic, versatile choice. It’s the Swiss Army knife of the art world.
- Student-Grade Paints – Cheap, bright, and less likely to dry out any faster than your coffee.
- Everyday Items – Think sponges, cotton swabs, or even paper towels. They’re your secret weapons.
Three Simple Techniques to Try
- Sponging: Dab a sponge in diluted paint and press it onto paper. The result? A dreamy, cloud‑like texture that looks like a masterpiece without the effort.
- Swab Swirl: Dip a cotton swab into a splash of colour and twist. On the paper, it’ll create jigglier, almost dancing arcs that never require a fancy wand.
- Stipple Pop: Using a toothbrush or a stiff Q‑tip, flick tiny droplets onto the canvas. The scatter of tones gives the page a whole new level of depth.
Why These Methods Are A Hit
They’re quick, they’re cheap, and they let your imagination run wild. Forget spending hours mastering brushwork or splurging on a professional kit; today you can paint your heart out with household staples.
So Get Started!
Grab your brushes, mix that paint, and let those everyday objects do the heavy lifting. With a little humour and a lot of colours, your artwork will look as if it’s ready for the gallery—all from a sofa‑side art studio.
1. Finger-Painted Abstracts

Get Your Hands Dirty: A Finger‑Paint Adventure
Credits: @Warrington Museum & Art Gallery
Ready to paint on the fly? Grab a brush (or, better yet, your own hands) and dive straight into the canvas. Here’s how to turn your fingertips into a palette of creativity.
- Choose Your Colors: Pick a handful of hues that feel exciting. The crazier the mix, the better.
- Mix on the Spot: Use your fingers to blend the shades right on the canvas. The texture you create will be totally unique.
- Let Go: Don’t think too hard—let your intuition handle where each streak lands. It’s all about spontaneous vibes.
- Embrace the Mess: Finger paint is messy, and that’s the point. The more chaotic, the more fun.
- Show Off Your Masterpiece: Once you’re happy with the flow of colors, step back and admire the spontaneous composition.
So, roll up your sleeves and let your fingers do the talking. Trust the process, let the colors mingle, and remember: the messier, the merrier!
2. Hot Air Balloons

Why Hot‑Air Balloons Make Every Sky Extra Sweet
Imagine a sky that’s been sprinkled with a burst of rainbow colors, as if the sun itself decided to hoist a colorful parade for everyone to see. Those charming hot‑air balloons ride the breeze like lazy tourists, inviting us all to share their unforgettable view.
What Makes Them So Delightful
- Bright, Contrasting Colors – Each balloon pops with a palette that cuts right through the clouds, turning the tableau into a living postcard.
- Soft, Ethereal Sky Washes – The background washes are like a gentle cloud‑kiss, adding depth without stealing the spotlight.
- Peaceful Ascendancy – There’s a quiet weightlessness in the air, like a whisper that says “enjoy the moment.”
- Wonder at Every Turn – When those balloons sway, it’s as if the world pauses to marvel, giving us a slice of awe with every breath.
A Quick Guide to Painting Your Own Balloon Scene
- Choose bright, contrasting hues for the balloons – think sunrise oranges, sky blues, or neon greens.
- Layer the sky with gentle watercolor washes to create that dreamy, cloud‑like backdrop.
- Let the balloons float freely; don’t overthink their path – the fun is in the random dance.
- Finish with a subtle, almost invisible glow around each balloon to evoke that magical, feather‑soft light.
Put all these elements together and you’re ready to lift your artwork off the page and into the imagination of anyone who sees it. Happy painting, and enjoy the look of pure wonder on their faces!
3. Christmas-themed Minimal Scenes

Cozy Christmas Vibes with Minimalist Touches
If you’re eyeing a snazzy limited color palette and simplified forms, you’ve already got the secret recipe for a heart‑warming holiday scene. Here’s how to make it feel like the best kind of cozy:
Pick Yours
- Colors: Think deep reds, snowy whites, and a dash of gold. Keep it simple – three shades is usually enough.
- Shapes: Curved windows, flat rooflines, and a gently slanted fence. No need for intricate carvings. Less is more here.
Add a Touch of Detail
- Cinnamon sticks: Scatter a few for that warm, spicy aroma.
- Little snowflake: A single, crinkly snowflake on a windowsill gives that festive feel.
- Singe of lights: Wrap a soft string of lights around the roof or chimney.
Make It A Space People Want To Stay In
When people glance at the scene, you want them to feel the chill and warmth at the same time. A well‑spaced composition with a prominent focal point – like a glowing fireplace – invites folks to linger. Keep the details subtle so they don’t overwhelm the scene.
So, grab your shades, keep the shapes friendly, add a dash of sparkle, and you’ll paint a picture that feels just like a snug evening by the fire. Happy decorating!
4. Line-Drawing Elephants

Getting Your Elephant Smooth with Watercolor
Step One: Lightly sketch out that majestic elephant—just a gentle outline to capture its shape.
Step Two: Start layering the watercolor. Watch the colors seep and mingle; the key is letting them bleed into each other for that soft, dreamy finish.
- Keep your strokes light and airy.
- Let the pigments run together; it’s all about that blended harmony.
- Blend until the whole piece feels balanced—no harsh edges, just a smooth, cohesive look.
5. Geometric Shapes Painting

Playful Watercolour: Shapes, Colour, and No Art‑School Stress
Skip the sketchpads and start making pretty from the get-go: circles, triangles and squares. Got a love for symmetry and a temper that can be a tad dramatic if you try to keep every line perfect? This is the perfect antidote.
What you’ll need
- Water‑soluble paints (the ones that keep the brushes from drying out on you)
- Hollow shapes – a plastic ring, a bevelled pencil that’s a triangle, a wooden square cut-out
- A calm cup of tea, because you’re about to unleash your inner child
The Quick & Easy Steps
- Outline the shapes on a light‑tinted paper. Keep it loose; this isn’t a coaching studio. The lines can be jazzy.
- Sweep a light wash of colour over each shape, letting the pigment spread like a lazy river.
- Repeat with playful hues – maybe a pop of coral for the circle, a sunny yellow for the square and a cool mint for the triangle.
- Once the paint sits, step back and laugh at how the shapes meet perfectly.
Why this is a Joyful Quick‑Start
No precision is required – your brain doesn’t need to perfect every corner. You’re making art that feels like a warm hug whenever you look at it. And if you want to show it off, just slam the final piece behind a phone case for a splash of daily nostalgia.
6. Easy Watercolor Still Life

Jump into Painting with Everyday Things
Credits: @Ruth Josephson
Ever wish you could channel your inner artist without a pricey studio? Start with what’s right in front of you—fruits, mugs, or even a dusty bookshelf. The key? Play with light and shadow and keep those brushstrokes gentle like a whispered secret.
Step-by-Step Guide for Beginners
- Choose a humble subject: A ripe apple, a steaming cup, or a solitary book on a table.
- Observe the light: Notice where the sun hits and where it retreats; those are your shadows.
- Paint with softness: Use light, airy strokes—think of a sigh on canvas.
- Enjoy the process: It’s a calming ritual, not a race to perfection.
Remember, the goal isn’t to look like Monet at first glance but to enjoy the act of observing and translating it onto a surface. Give it a shot—you might just discover a hidden knack for capturing the ordinary with a splash of artistry.
7. Gradient Washes

Turning a Blank Canvas Into a Colorful Story
Ever watched an artist pull a blurry, misty background out of nothing and wonder, how did they do that? The secret? Gradient washes—smooth color slides that shift from light to dark or one shade to the next.
The Basics of a Seamless Color Slide
- Start Light, Fade to Dark: Think of it as a sunrise that ends in twilight—gradually building intensity.
- Blend Hues: Swap one color for another without any harsh edges—like a gentle whisper between pigments.
- Create Mood: Use the gradient to set the tone—whether you want a dreamy atmosphere or an abstract splash.
Why It Works
When colors flow into each other, your eye travels instead of jump-backing. That makes the scene feel alive, like a painting that’s breathing.
Quick Tips to Nail It
- Choose a base hue and keep your palette in the same family.
- Layer slowly—more of a slow drip than a wild splash.
- Let the brush do the heavy lifting; you’re just guiding the transition.
Ready, Set, Color!
So grab your brushes and palettes; it’s time to paint that smooth, dreamy backdrop you’ve been dreaming about. Once you’re in the rhythm of gradual shading, you’ll find your artwork takes on a whole new depth. Happy painting!
8. Monochrome Painting for Beginners

One‑Colour Wonder: A Light‑and‑Value Adventure
Think of your canvas as a tiny island where the only rule is you can only use one color. No messy palettes, no colour‑mixing headaches—just pure value, light, and depth. It’s the easy‑going way to master how light plays on a surface without getting lost in the colour sea.
- Blue Breeze: Calm, cool, and perfect for a peaceful scene.
- Brown Earth: Warmth that feels like a snug hug.
- Grey Glow: Sophisticated and subtle, great for dramatic moods.
Give any of these shades a go—watch your artwork come to life with that extra layer of depth, and enjoy the simplicity of mastering value without the extra fuss of colour mixing.
9. Natural Textures (Wood, Stone, Marble)

Master the Art of Natural Texture Replication
Why You Should Care
Imagine a piece that feels like real wood, stone, or marble—every grain, groove, and shadow speaks to authenticity. When you nail the details, the work doesn’t just look good; it lives in the viewer’s imagination.
Key Steps to Get It Right
- Study the Surface. Spend time watching how light dances on a piece of bark or a polished stone. Notice the subtle variations: thin veins in wood, the swirl of marble, or the mottled look of cobblestones.
- Layer for Depth. Build your texture in layers—start light, gradually add darker tones, and finish with highlights to mimic the way shadows fall on real material.
- Feel the Texture. When possible, touch the real object. Feel the bumps, the ridges, the smoothness. That tactile sense will translate into a more believable rendering.
- Enrich Variations. Natural surfaces never repeat exactly. Add subtle differences in color and texture to keep the piece engaging.
Take It to the Next Level
Blend your observations with a touch of your own style—think of it as giving the material a personality. A little humor or whimsy can soften hard stone into a friendly backdrop or turn a forest floor into a storytelling canvas.
Final Thought
Capturing the soul of natural textures isn’t just a technical exercise; it’s an invitation to bring a slice of reality into art. Happy layering!
10. Insects (Butterflies, Ladybugs, Caterpillars)

Insects in All Their Splendor
Why tiny bugs are the unsung artists of nature
Ever glanced at a dragonfly and thought, “Wow, that’s a pocket-sized rainbow!”? That’s the romantic side of insects — they’re the tiny painters of the wild. With eyes that are literally the size of a blue‑yellow splash and wings that glitter like mica, they’ve got a whole lot going on that makes us stop and say “Whoa.”
Color Schemes That Beat the Triplets
- Crystal Wings: Dragonflies and damselflies flaunt those translucent, iridescent silhouettes that change color with every angle – like a natural kaleidoscope.
- Berry‑Red Ants: Some ants wear a bright scarlet patch that’s so vivid it practically screams “I’m part of the food chain!”
- Mossy Mimicry: Certain beetles mimic the colors of the pine needles they chill on, turning into undercover spies in the forest.
Patterns That Make Your Head Spin
Check out the intricate lines on a ladybug’s shell or the spiraled mosaic on a butterfly’s wings. These patterns aren’t just pretty; they’re also super useful – camouflage, warning signals, and even helping the insects keep warm. Imagine designing a fashion line that’s simultaneously edible and camouflage-ready.
Monothemic Charm You’ll Love
Despite the dazzling colors and complex patterns, insects keep it simple: a body shaped like a slice of pizza (round and ergonomic), legs that look like tiny spears, and an endless supply of wings (much more portable than one’s living rooms). That’s the beauty of minimalistic design: less is more, even in the microscopic realm.
Nature’s Calligraphy
Their bodies are nature’s own brushstrokes, swirling across leaves and petals, tapping out a soundtrack that syncs with the rustle of the wind. Say “Hello!” to a butterfly that lands on your hand – it’s like a butterskin couture show.
Take a Walk
Next time you’re out for a stroll in a park or a backyard, look up a lil’ midnight‑wonder – a moth with glowing spots. See how it blends effortless beauty with practical survival skills? It’s a reminder that every small creature is a masterpiece waiting to be admired. And, who knows? Maybe the next time you’ll spot a friendly beetle, you’ll realize it’s not just a bug, it’s an ecosystem’s tiny ambassador.
11. Wildflowers

Wildflower Vibes
Let the unbridled charm of wildflowers burst across the page—think of a meadow that’s been let loose on a color wheel. It’s all about the quirky shapes, the range of sizes, and that antics of hues that would make any artist feel a little envious.
- Shapes – From the spiky bristles that look ready for a stargazing party to the eye‑catching daisy fronts and those little star‑shaped petals that practically shout “I’m fabulous!”
- Sizes – There’s the teenage‑tall giant daisies, the teeny‑tiny poppies that fit in your pocket, and the medium‑sized showers that form a perfected “under‑the‑umbrella” vibe.
- Colors – A dizzying medley: fiery reds, midnight blues, sunny yellows, magenta winks, and even that secretive green that practically says “I’m coming from the rainforest.”
Imagine each of these flowers as a small, individual party in a vast garden. The scenery’s ripe to be photographed, and the result is a picture that feels alive—not just natural, but animated with wild, spontaneous energy.
Credits: @Flickr
12. Orchids

Orchids: Nature’s Gilded Pearl
Ever caught sight of a flower that looks like it was designed by a fine‑tuned artist? Those are orchids—tiny, elegant masterpieces flaunting an artistry that can make even the most seasoned painter pause.
Key Features that Make Orchids the Zen Garden’s VIPs
- Unique Petal Structures—Every orchid flaunts a distinct petal shape that feels like an intentional dance of geometry and grace.
- Vibrant Splash of Color—From midnight purple to sunrise amber, their hues are packed, trippy, and downright mesmerizing.
- Graceful Curves—Petals roll, twist, and bow in a choreography that turns each bloom into a trapeze act of pure visual poetry.
Let’s Talk “Exotic” and “Refined”
Orchids are like the high‑end boutique of the botanical world. They’re not just any flower; they’re specific, specialized, and at times, downright elusive. It’s this mixture of exotic rarity and refined elegance that makes them the talk of every garden party.
Why You’ll Love Them
Alright, grab a coffee or tea—because you’re about to get seduced by these little marvels. First, their petal architecture feels like it was flash‑drawn in a cosmic sketchbook. Next, the color spectrum is so vibrant it could give a rainforest a run for its money. And last but not least, the subtle curves—those tiny swoops and folds—are a reminder that sometimes the smallest movement can echo the grandest symphonies.
Final Thought
Orchids are a breath of fresh air, an explosion of color, and a testament to how nature can outperform even our best human creations. If you’ve ever dreamed of a flower that’s both an art piece and a living wonder, then cue the orchids into your world.
13. Poppies

Hope in a Petal: The Whimsical World of Poppies
Ever seen a flower that could make the world pause for a moment? Meet the poppy – the pop-of-all-flowers, with a personality that’s a mix of drama and gentle charm.
What Makes Them Tick
- Crinkled petals that look like nature’s own feathered confetti.
- Vivid splash of color – from flaming reds to soft pink whispers.
- The dark center, that tiny eye‑catcher, providing a dramatic backdrop that’s a perfect foil for every petal.
Why They’re Ephemeral
Poppies are the artful amateurs of the garden world, blooming fiercely and then fading as if they’ve run a marathon and dozed off midway. That fleeting moment is what makes them so heart‑galloping appealing.
Feel the Pop
When you’re in a field of them, you’ll feel as though you’re stepping into a time‑compressed fairyland. Each poppy is asking you to appreciate the present before the petals go quiet and the colors wane.
Remember Them
Capture the poppies on a camera or in your mind, but never forget that every poppy, no matter how fleeting, is a bold little burst of life that paints the earth with hope. Remember to cherish the moment before it’s gone – that’s the secret to surviving the inevitable “fade.”
14. Roses

Embrace the Timeless Charm of Roses
1⃣ The Magic Behind Every Petal
2⃣ Why Roses Still Get All the Love
3⃣ Painting Tips for a Dash of Classic Goodness
Remember, every rose is a fresh page ready to write a story full of warmth and wonder.
15. Hyacinths

Hyacinth Harmony
Picture this: a riot of vibrant hues squeezing together like a well‑packed basketball team. These little conical wonders are not just pretty; they’re the ambassadors of fragrance, spreading their sweet scent across the garden.
What Makes Hyacinths Stand Out?
- Clustered Beauty: Imagine a miniature bouquet where every bloom is an eager teammate—packed so tight that even a microscope would envy the density.
- Strong Conical Forms: Think of a miniature barrel, but with petals. Their geometry is a proud proclamation of nature’s love for shape.
- Fragrant Charm: The scent hits you like a gentle hug—subtle, yet unforgettable.
Why You’ll Fall in Love
From the moment you step into a field of these bulbs, you’ll feel the garden whispering stories of spring, each petal echoing a note of celebration. It’s not just a flower; it’s a sensory adventure that uplifts the spirit.
Back by the Lens of @Lillyho
Through restyled frames and a touch of whimsy, @Lillyho captures the heart of these blooms—turning everyday petals into a timeless snapshot that invites you to pause, breathe, and savor the moment.
16. Sunflowers

Sunflower Spotlight
Shoutout to @Images & Messages for painting these bright beauties onto our feeds
Why Sunflowers Are the Sun’s Personal Cheerleaders
- Golden petals that scream “Let’s bask in the sunshine!”
- Stark dark centers—nature’s tiny black eye keeping everything in check.
- Built‑in fans: they pivot toward the sun like it’s the hottest new playlist.
Feel the warmth, catch the vibes
When you’re wandering through a field of sunflowers, you can’t help but feel the sun’s energy pulsing through their bright petals and steadfast cores. It’s a living reminder that while life’s hurricanes may spin around, staying sun‑focused brings warmth and vitality to everything you touch.
Takeaway: Stay golden
Next time you spot a sunflower, let its radiant attitude inspire you to chase the light—literal or figuratively—everyday. Those blooms aren’t just pretty; they’re a sunshine‑powered pep‑talk that keeps us bright and buzzing all day long.
17. Lilies

Lilies: The Elegant Showstoppers of the Garden
Imagine stepping into a secret garden where the walls are silk and the air smells like sweet gossip. That’s the world lilies paint—with their buttery petals and perfectly poised stems, they’re the real-life diva of the plant kingdom.
Petals that Pose
- Soft, velvety texture: as if each blossom were a delicately knitted blanket.
- Rippling layers: they don’t just flower; they drip with style.
- Colors that pop: from pristine whites to bold blushes—each shade designed to whisper, “Look at me.”
Stamens that Snap the Spotlight
Every lily flaunts a proud center of stamens—short, bold spikes that stand up like tiny fireworks. They’re the flower’s signature hairdo, adding a pop of texture that catches the eye from every angle.
Patterns: The Silent Art
Don’t mistake these blooms for plain. Underneath every petal lies an intricate pattern—like secret codes that only a keen eye can decode:
- Subtle swirls that trail like ink on a page.
- Spots that punch in contrast, making the colors dance.
Why Lily Lovers Are in Love
They’re simplicity with a twist: elegant petals, a siren’s stamen, and a language of patterns. It’s the classic one‑liner that says, “I’m pretty, I’m fragrant, and I’ve got a few tricks up my sleeves.”
So next time you walk by a lilied path, pause and let your senses applaud the flower’s graceful form—a bouquet that’s both pure and playfully daring.
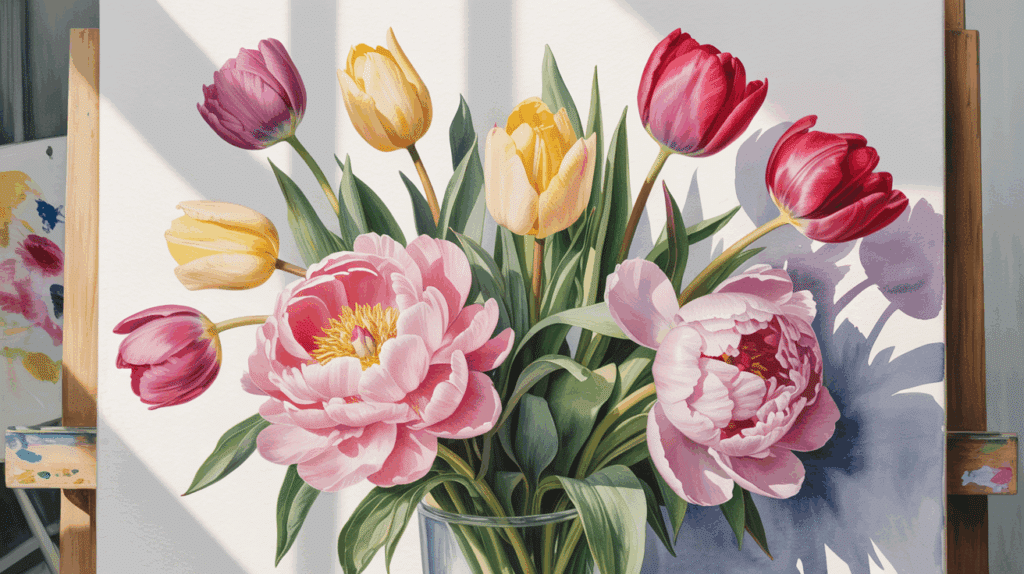
18. Tulips

Explore the Charm of Tulips
Why Tulips Are the Florist’s Cupcakes
Picture a flower that looks like it was born to be a stylish, single‑piece dessert: that’s a tulip. Its celebrated pile‑on‑pup shape gives it the look of a miniature, nature‑crafted cupcake, and it comes in an alarmingly wide spectrum of flavors.
What Makes Them Striking
- Sturdy Lines – Almost every tulip has a confident, straight contour that gives it an unmistakable silhouette.
- Color Explosion – From blush pinks to deep indigo, the petals can blaze with any hue you can think of.
- Simple Yet Bold – No fuss, no frills. The tulip keeps it minimalistic but still turns heads.
Feeling Inspired?
Next time you’re strolling through a market or walking in your garden, pause and admire these cup‑shaped wonders. They’re not just pretty—they’re a reminder that even a bold, simple shape can bring a sunrise of colors to the world around us.
19. Sunset Gradients

Sunset Serenity: Crafting an Irresistible Gradient
Credits aside: Big thanks to @Leopard Hat for sparking the idea—now it’s your turn to bring the canvas to life.
What Makes a Sunset Gradient Truly Trump
- Blend Harmoniously: Let those warm shades (think amber, tangerine, and sienna) stitch together like best friends. Each color should feel like it’s pouring into the next.
- Mind the Atmosphere: Picture the soft glow that wraps the horizon. It’s not just light; it’s a mood. Capture that gentle rippling shimmer with a touch of pastel.
- Detect the Shift: Noon to dusk is a roller coaster of color. Show the transition—from bright yellows to dusky purples—so the eye can follow the sun’s graceful descent.
Pro Tip: Keep Your Palette Flexible
Use a small set of base colors and mix on the fly. A spritz of cool blue at the edges keeps the warm palette from looking flat, while a dash of magenta can kick the evening just enough to keep it exciting.
Try It Out!
Grab a fresh canvas, feel the warmth of the setting sun in your soul, and let those colors flow. Paint a sunset that not only looks pretty but feels like a hug on a chilly evening.
20. Cloudscapes

For the Love of Clouds
Hey there, fellow sky‑ghoul! If you’ve ever stared up at the sky and felt a spark in your soul, you’re not alone. We’re all in the same cloud‑crushing club. Let’s dive into the art of painting these frothy wonders.
Why We Do It
Clouds don’t just billow or swoop—they tell stories. From the gentle wisps of cirrus to the thunderous drama of cumulonimbus, each puff has a vibe that’s begging to be captured on canvas. And trust me, the sky never gets boring—it keeps remixing itself every hour.
Techniques That Make Clouds Pop
- Light Tricks: Play with sunrise, sunset, or midday glare to give those fluffy forms a sweet glow or a somber mood.
- Shadow Play: Shadow lines help give depth—think of it as giving your clouds a 3‑D makeover on a 2‑D surface.
- Atmospheric Depth: Layer colors from light blues at the front to darker mauves in the back; it makes the sky feel like a textured postcard.
- Texture Magic: Matte washes for velvety cumulus, quick splashes for mischievous cumulus clouds.
Quick Cloud Checklist
- Cirrus – airy, feather‑like strips.
- Cumulus – billowy, puffy clouds.
- Cumulonimbus – the big‑battle variety that rolls thunder.
- Stratus – low and fluffy, like a blanket.
- Altocumulus – mid‑altitude squbies.
So grab your brushes, set your colors, and let the sky be your muse. Remember: the sky’s endless variations are the ultimate canvas for anybody who wants to paint a bit of wonder. Happy cloud hunting!
21. Forest Silhouettes

Capturing the Calm of a Nighttime Forest
Have you ever stared at a city skyline and wished there was a quiet, leafy escape? That’s exactly what @talina has conjured. In their latest piece, the forest isn’t just a background – it’s the star of the show.
What Makes It Tick
- Silhouettes that pop – Trees are rendered in a deep, almost-black hue so they stand out starkly against the sky.
- The glow that lures you – A warm, soft light spills across the horizon, giving the whole scene a gentle, nostalgic vibe.
- Depth that feels real – Layers of shading create an atmosphere that pulls the viewer into the woods.
Why We’re All About This Mood
It’s not just a pretty picture. The contrast tricks our eyes into perceiving a whole forest beneath the heavens, even though the trees themselves are nothing but dark outlines. That trick—plus the glowing sky—turns a simple illustration into a “wow” moment that feels both cozy and cinematic.
Behind the Scenes
Talina mixed a bit of watercolor techniques, a splash of light exploration, and a whole lot of imagination. The result? An illustration that’s as comforting as a campfire story and as spectacular as a sunrise over the mountains.
So next time you scroll past a forest scene, hold it in your mind a little longer. You might discover a whole vibe of tranquility hidden in those shadowy branches.
22. Beach Sunset Scapes

Sunset Bliss Along the Shoreline
Picture this: a sun slowly dipping behind the horizon, turning the sky into a canvas of buttery oranges, rosy pinks, and deep indigo. The golden rays dance across the waves, creating a shimmering trail that ripples down toward the shoreline. And on the sand, the sun’s last light paints a sparkling carpet of gold, leaving footprints in its glow.
Key Elements That Make the Scene Pop:
- Water Reflection: Each wave catches the sunset light like a tiny mirror, turning the sea into a moving mosaic of colors.
- Sand Glow: The wet grains of sand shine bright, reflecting the fading sunlight and giving the beach a subtle, warm glow.
- Sky Palette: As the sun sets, the sky flips from soft pastels to vivid, almost electric hues—perfect for capturing that breathtaking mood.
How to Capture the Magic:
- Position yourself a bit back from the water to include the horizon in your frame.
- Let the sun hit the water at an angle—this sets off the most vibrant reflections.
- Don’t forget to layer in elements like dunes or distant ships to add depth.
- Use a slight overexposure to let the colors bleed a little, but keep the details crisp.
Final Touches
When editing, add a gentle vignette to focus the eye toward the center, and maybe boost the saturation just enough to make those sunset hues pop without turning them into a cartoon. Add a little soft blur to the sand so the footprints remain but the overall feel stays dreamy.
Now, go out there and freeze that beach sunset moment—your feed’s about to have a major glow-up!
23. Autumn Leaves

Paint the Autumn Mood: A Cheerful Brush Adventure
Credits: @Bridget Greene | Art For Animal lovers
Why Fall Leaves are a Joyride
Imagine a canvas bursting with the color of a sunset, the crispness of a cool breeze, and the memory of crunchy leaves beneath your feet. That’s exactly what painting fall foliage feels like—a fun, mesmerising task that lets you bring nature’s own palette right into your studio.
Get Ready with Warm Hues
For those just starting out, the trick is to blend the familiar reds, oranges, and yellows that mean “autumn.” If you’re feeling a bit “green”‑ish, a soft wash of green can add depth and keep the scene from feeling flat.
- Red – for those fiery, firecracker leaves.
- Orange – the cozy, pumpkin‑earth tone.
- Yellow – add sunshine and a touch of nostalgia.
- Green – a subtle background that balances the overall warm look.
Sketching Made Simple
Fearful of complicated lines? No worries! The irregular shapes of fallen leaves are your best friend. They let you dab and swoop with a sense of playful freedom.
The Playful Brush Dance
Once you’ve laid down the hues, it’s time to let your brush take the lead. Don’t chase perfection—just let your strokes wander like a leaf in the wind. Turn the painting into a story of color and movement and watch your confidence grow.
24. Starry Night Easy Painting

Starlit Canvas: A Chill Night Sky Adventure
Ever feel like the world is too loud? Grab a canvas, pick up your brushes, and let the cosmos become your backdrop. This is a playful guide to creating a dreamy night sky that melts the stress away.
What You’ll Need
- Canvas or thick paper
- A handful of deep‑blue acrylics (or oils, if you’re feeling fancy)
- A splash of white paint for stars
- Some blending brushes and a sponge for a quick spatter motif
- Optional: a modest hill or tree silhouette for that “extra wow” factor
Step‑by‑Step Creation
1. Lay the foundation。 Start with a generous coat of deep blue for the base. Swirl it lightly—no rush, just a gentle spreading.
2. Mix in the stars。 Use a broad brush: dab white paint across the canvas. You’re turning a base into a whimsical constellational sky.
3. Blend to your heart’s content。 Let the edges of each “star” soften into the blue. It’s the sweet spot where pigment marries imagination.
4. The spatter magic。 Grab a sponge or a stiff brush and flick your brush—watch miniature clouds of glitter pop. It feels like spontaneous fireworks.
5. Add the silhouette。 Sketch a simple hill or a lone tree. Think silhouettes, not details—just a hint of shape to hint at the ground below.
Once you step back, the landscape feels alive and dreamy—an instant mental vacation.
Final Touches
Just a quick haze over the stars if you want a slightly ethereal glow. Then sit back, breathe, and let that canvas remind you how relaxed you can feel when you simply let the night sky unfold at your fingertips.
Credits: @Shavellia
25. Shark Painting

Shark: The Ultimate Fish‑Ninja
Picture a jaw‑dropping, slick‑silhouette predator gliding through the deep. No stopwatch needed—its movements are the ocean’s own fast‑forward filter. Light ripples over its polished body, turning each ripple into a shimmering spotlight that hints at both grace and deadly ambition.
Why we love this sleek beast
- Speed freaks: Unlike a mop‑up, a shark uses fins like a skateboard’s wheels—quick turns, swift sprints.
- Glide Mastery: It doesn’t swim; it slides—almost like gliding on an invisible outrigger.
- Light Play: The shaft of sunlight on the water’s surface paints a living, moving piece of art.
The Poignant Power
What makes it mesmerizing isn’t just its violent efficiency, but the mystique that rises with every ripple. That edge of mystery? It whispers to the curious, an invitation to explore unseen depths.
Credit Where It’s Due
Credits: @⋆Sienna⋆ for the vivid, opaquely poetic inspiration.
26. Desert Landscape & Cacti

Desert Dreamscape: The Cactus Chronicles
Why Cacti Are the Real Stars of the Desert
Picture a place where the sun paints everything in golden hues, the ground looks like a gold‑spattered beach, and every turn of the road surprises you with wild, woody art. This is the desert, where cacti are not just plants—they’re the stage set pieces of a gritty, yet gentle drama.
The Starlit Contrasts that Make the Landscape Pop
- Arid Clay – the sand, golden and silky, holds the secrets of ancient dunes and endless horizons.
- Rugged Mountains – these stoic ranges, shaved to jagged silhouettes, stand guard over the cacti.
- Scintillating Cacti – sharp, spiky, and surprisingly artistic, these plants seem to have a sixth sense for shaping themselves into sculptural masterpieces.
What Makes the Desert a Playground for Your Imagination
Every cactus tells a story: a cactus that’s moved across the dunes over decades, a cactus that has stood tall during a storm, or one that is a clever mimic of an alien landscape. Imagine a young sapling sprouting in the heart of a dusty valley, slowly becoming a towering sentry that holds the night sky in its spines.
Why You’ll Never Look at the Desert the Same Way Again
From the moment you step onto that dusty edge, you’re dragged into a living canvas. Every angle opens up a new piece—whether that’s the vibrancy of sunlit angles or the quiet softness of the shaded valleys. It’s a reminder that nature can build its own museums without code or gallery lights—just the innate honesty of a cactus.
The Takeaway
Whether you’re an artist, a writer, or just someone who loves a good sunset, the desert landscape with cacti offers a raw, almost alien beauty that can make you want to invest all your emotions into an effort to capture it.
27. Simple Bear Illustration

How to Sketch a Sweet, Simple Bear
Why Go Minimal?
Keeping lines light and colors soft lets the bear feel warm and approachable. Think of a sleepy kitten or a cuddly cloud—gentle and unassuming.
Step 1: Outline the Shape
- Start with a big, circular “head” that’s a bit larger than the body.
- Attach a slightly oval torso, hugging the head for a snug, friendly look.
- Draw two tiny, round ears perched at the top‑right and top‑left of the head.
Step 2: Add the Features
- Place two small, almond‑shaped eyes that glow with delight.
- Give the nose a gentle, heart‑shaped tip—easy to recognize and instantly endearing.
- Sketch a tiny, smiling mouth that’s crescent‑shaped; no curls, just a subtle arch.
Step 3: Define the Limbs
- Use the thinnest lines to create arms that hang loosely down the sides.
- Legs can be simple ovals, slightly spread to suggest a relaxed stance.
- Tip the toes with soft, rounded corners—no sharp edges.
Step 4: Keep Colors Soft and Subtle
- Select a palette of light browns, muted grays, and pastel accents.
- Fill the bear with these gentle hues; avoid heavy shading.
- Add a faint blush to the cheeks for an added touch of warmth.
The Final Touch
Zoom out, step back, and smile at your bear. If it feels like a “bug‑friendly” creature that’s all set to hug anyone, you’re done! Celebrate the charm and share it with the world—after all, everyone loves a sweet, low‑key bear.
28. Giraffe

Spotlight on the Giraffe: The Tallest Trendsetter in the Savannah
Ever wondered what it feels like to walk among the clouds? Put on a pair of spotted sneakers and step into the world of the giraffe—nature’s walking runway.
Why Giraffes Are the Real High‑Fashion Icons
- Spotlight on Spots: Those iconic leaf‑shaped patterns are not just for show—they’re a passport to the elite “top‑eaters” club.
- The Neck Tease: A neck that stretches 1.5–2 meters? Talk about length! It’s the perfect stretch for selfies, towering over trees and those selfie bars.
- Soft‑Spoken Elegance: Unlike the thunderous gazelle, giraffes speak in a whisper—gentle, calm, and always looking for a peaceful brunch among leaves.
From the Outskirts of the Safari to Your Living Room
Imagine a sleek, elegant portrait: a giraffe’s silhouette against a gradient sunset, a subtle smile that could melt even the sternest zoo guard. Its eyes carry a hint of wonder—like it’s saying, “Hey, look up—everything ain’t just ground level. ”
Fun Fact: Giraffe Heights and Heartbeats
Height: Up to 5.5 m (18 ft) for some of the tallest members—loud gossip hat for the lever group.
Heart Rate: Around 45 BPM, a gentle rhythm matching their slow‑shaded stride.
Next time you search “royalty from the wild,” remember that giraffes bring the whole “royal” vibe—long‑necked, spotted, and strikingly serene.
29. Loose Circles Abstract

Unleash Your Inner Circle Artist
Credits: @KENDA DAVIS – The Sequel
Why Circles Rock
Ever notice how a simple circle can jump, spin, and make the whole canvas vibrate? The trick? Loose, overlapping shapes that scream freedom and playfulness. Don’t be afraid to let those colors flow like a carefree jam session.
Getting Started: The Rough Sketch
- Grab a pen or a paintbrush—whatever floats your boat.
- Throw random circles onto your paper. Bigger ones first, then splash in the smaller ones.
- Let them overlap like the last-minute friends you add to a group text.
Color Choices That Spark Energy
Pick a palette that feels as vibrant as your mood. If you’re in a high‑energy zone, go bold and bright. For more relaxed vibes, cool, muted tones keep the rhythm chill.
Pro Tip
Don’t aim for symmetry. Embrace the chaos—it’s the secret ingredient that makes your piece feel alive and younger than a newborn kitten.
Final Flourish
Step back, imagine your canvas as a party, and let every circle dance to its own beat. When that visual rhythm is set, you’ve nailed the playful essence of The Sequel—and you’ll feel like an artistic rockstar.
30. Eucalyptus Branch Line‑and‑wash

A Gentle Waltz Between Eucalyptus Branches and Watercolor
Picture this: a slender line‑drawing of eucalyptus branches, each leaf curling like a small, quiet invitation. The artist has quickly sketched the outlines, daring the leaves to breathe. Now comes the real magic—soft washes of watercolors that whisper the tree’s secret color palette: a muted green softened with just a touch of blue.
Step‑by‑Step Charm
- Line Drafting – Start with delicate lines; think of the branches as faint, eager ballerinas poised for applause.
- Leaf Outline – Trace the distinctive leaf shapes; they’re the show’s marquee, clearly announcing the eucalyptus’s identity.
- Watercolor Serenade – Lay down gentle washes; let those muted greens mingle with gentle blues, creating a mood rather than a burst of flamboyant color.
Why It Works
By marrying the precision of line work with the fluidity of watercolor, you achieve a balanced, almost meditative piece. The branches maintain clarity, while the washes breathe life and depth into the greens and blues, giving the whole illustration an airy, almost pastoral feel.
Credits
Special thanks to @Lara Wegdam for sparking this elegant fusion.
31. Pebble Compositions

Pebble Power: Crafting Mini-Masterpieces with Lena Andersson
When you ask a pro like @Lena Andersson to play with pebbles, you don’t just get a messy sorting job – you get a whole new kind of art. Lena takes these humble stones, arranges them into whimsical compositions, and then gets that special touch that turns an ordinary beach rock into a spotlight‑on‑stage shimmer.
Why Pebbles Are the New Canvas
- Diverse shapes – from generically rounded to oddly angular, each pebble has its own personality.
- Surface vibes – whether they’re slick like a bathtub or rough as a good morning, the texture lets light play right on the stone.
- Color palette – subtle hues mingle, making each piece feel fresh as a beach sunrise.
- Light vs. shadow dance – a simple tilt can yield a dramatic contrast that turns a plain pebble into a dramatic star.
Getting the Good Stuff
First, pick the pebbles that catch your eye. Then, arrange them in patterns that look like tiny islands or modern abstract art. Finally, paint them with gentle strokes – or just let the natural color shine, letting the sunlight do the heavy lifting. The result? A piece that feels alive, as if the pebbles themselves are shouting “Look at me!”
Takeaway
Lena Andersson reminds us that art isn’t just about canvas and brushes. With a bit of creativity, even the most ordinary stones can become a spectacular showstopper. So next time you’re wandering along a shoreline, pause – you might just be looking at a masterpiece in the making.
32. Wintery Holly & Greenery

Get Ready to Deck the Halls!
Credits: @Joyce Griffin – The mastermind behind the merry vibe that’s coming your way.
Why Wintery Holly is a Must‑Have
Picture those lush, deep‑green leaves, almost like a forest in a box, and the bold, pop‑of‑red berries that scream “festive”. They’re the secret sauce for any holiday look that’s both classic and eye‑catching.
Adding a Touch of Frosty Fantasy
- Subtle snow‑like glitter, giving that winter wonderland feel.
- A hint of icy sheen to make every plant glow like it’s just stepped out of a cozy cabin keyhole.
Style Tips for the Season
Want to make your décor pop?
1. Layer the greens – start with the deepest hues to set a lush backdrop.
2. Drop in the bright berries – they add that striking contrast.
3. Sprinkle a little frosty sparkle – a dash of white or silvery accents keeps the scene feeling fresh and realistic.
With this trio, your holiday décor will not only look merry but also warm, inviting, and a bit cheeky.
Final Thought
So grab your supply of holly, throw in some red berries, a whisper of frost, and watch that holiday spirit bloom. Happy decorating, and may your festivities be as bright as those berries!
33. Valentine’s Mug with Saucer

Create a Cozy Valentine’s Mug & Saucer
Grab your favorite colors and turn a plain mug into a sweet, heart‑filled masterpiece. Think soft pastels and a gentle vibe—just the right mood for a romantic coffee break.
Step‑by‑Step Fun
- Collect your materials: A plain mug, glossy/silicone paint, a heart stencil (or freehand), and a felt brush.
- Choose your palette: Soft pinks, peaches, or mellow lilacs. Pro tip: Mix a splash of lavender for that dreamy feel.
- Sketch the design: Lightly outline a heart or a couple of tiny cupid arrows on the mug and saucer. Keep it subtle—no need for a full-heart explosion.
- Paint it: Use smooth strokes to blend colors. If you’re feeling daring, add a tiny sparkle to the heart for extra charm.
- Seal the art: Once dry, glaze the piece as per paint instructions to make it dishwasher safe.
- Serve love: Fill with your favorite hot beverage and watch that smile bloom.
Why This Works
This little touch of soft color and a sweet heart motif transforms an everyday mug into a mini love letter—perfect for gifting or a personal indulgence. Its gentle hues create a cozy, inviting atmosphere that hugs you as soon as you take that first sip.
Happy painting, and may your mug sip your love story!
34. Easter Egg Gradient Techniques

Brighten Up Your Easter Egg Game with Smooth Gradient Hacks
Stuck in the same old yellow‑and‑orange hue maze? Let’s flip the script and turn your Easter eggs into living canvases of color!
Why Gradients Are the Secret Sauce
- Instant Wow Factor: A gentle swirl from one shade to the next grabs attention faster than a glitter bomb.
- Festive Vibes: Those seamless transitions naturally immerse the egg in a holiday mood—think “sunrise at a pastel beach.”
- Custom‑Fit for Any Egg Shape: Whether it’s a classic oval or a quirky heart, gradients glide effortlessly across the surface.
Quick Steps to Achieve the Perfect Egg‑Shaped Gradient
- Select Your Color Palette: Pick 3–4 complementary hues. A warm trio (sunset orange, peach, vanilla) works wonders.
- Choose the Gradient Direction: Horizontal for a relaxed feel, vertical for dramatic flair, or radial to mimic a sunrise.
- Apply With Seamless Blend Mode: Use “multiply” or “overlay” in your design tool to let the colors mingle naturally.
- Test on the Egg Outline: Adjust the gradient stops right where the egg’s curvature meets, ensuring the color flow follows the shape.
- Finish With a Sprinkle of Texture: Add a subtle marbling effect for extra depth—just enough to keep the eye dancing.
Pro Tip: Give Your Eggs a“Breeze” of Surprise
When the gradient’s done, throw in a faint metallic sheen or a quick sparkle animation. You’ll have every egg looking like a tiny, glowing sunrise that’s impossible to ignore.
Happy Easter‑crafting—may your eggs shine brighter than the candy inside!
35. Sketch‑then‑paint Item/Scene

Start With a Solid Blueprint, Then Bring It to Life
Think of your art project like building a house: first you make a detailed sketch of the room you want to decorate, and only when the floorplan is nailed down do you splash on the paint. This method keeps your creative foundation strong and helps you spot any quirks before the colors even hit the canvas.
-
Sketching: The “Blueprint”
Grab a pencil, paper, or a digital tablet—and outline your subject or landscape. Pay attention to shapes, proportions, and perspective. This stage is all about getting the math right.
-
Painting: Adding the Finishing Touches
Once the drawing feels solid, you can confidently apply color. The structure you’ve set up lets you paint with confidence, knowing each stroke adds depth without compromising balance.
Bottom line: a thoughtful sketch keeps you grounded, while the painting phase really lets your creativity shine.
36. Q‑tip Fireflies (minimal Dots)

Ticklish Torchbees: Crafting Charming Q‑Tip Fireflies
Credits: @Melissa Meyer
What You’ll Need
- A pack of inexpensive Q‑tips (cotton sticks) – the smaller the better!
- A few dropper brushes or paint pens with ultra‑soft, glowing hues (mint green, pale yellow, blush pink)
- A dark backdrop – a plain black sheet, a twilight‑blue wall, or even a night‑time photo prints a perfect canvas
- One dash of glitter paint or tiny sequins if you’re feeling extra sparkly
Step‑by‑Step Blink‑Brite Instructions
- Slice and sculpt: Cut each Q‑tip into tiny squares or crescent shapes, giving each “firefly” a mini body.
- Brush‑up the glow: Lightly dab your chosen colors into the surface – forget the heavy layers, just a dash to keep the vibe ethereal.
- Add the sparkle: A few glitter specks or a sprinkle of sequins on the tip’s tip makes them sparkle like real fireflies in a moonlit meadow.
- Arrange them across your dark backdrop: Scatter the Q‑tips in random clusters, giving the illusion of a dancing swarm.
- Optional: Use a small LED flashlight to shine a warm beam around them and enhance their glowing feel.
Why It Feels like Magic
With minimal dots and soft, glowing colors, the Q‑tips turn into miniature, whimsical fireflies that seem to blink and glow against the darkness. It’s the perfect DIY treat for a low‑effort, high‑impact mood‑booster.
Remember the Twist
Keep the strokes light – the less paint, the more airy the visual. That’s the secret recipe for enchanting luminescence that feels fresh and lively, just like the gentle flutter of a real firefly.
37. Painted Tote Bag Designs

Meet the Master of Tote‑Bag Art
Shout‑out to the creative genius behind every splash of color that turns a plain canvas into a personal banner: @Анастасия Петрова.
What She’s Doing
- Designing wild, eye‑catching graphics that jump out of the bag at first glance.
- Painting bold patterns that make the tote feel like a wearable piece of art.
- Crafting whimsical illustrations that give each bag a story of its own.
The Boldness Behind the Brush
Her process isn’t just about choosing a color palette—
- It starts with a splash of imagination.
- Then she sketches ideas that feel like doodles straight from a spontaneous morning brainstorm.
- Finally, she brings them to life with vibrant paints that pop against the canvas.
Why It Matters
When you grab one of her tote bags, you’re not just carrying groceries—you’re carrying a statement, an explosion of personality. It’s the perfect way to say “This is who I am” without saying a single word.
So next time you see a bag that looks like it could rival an Instagram feed, you’ll know the reason: it’s all thanks to the paint‑slinging, design‑loving wizard, @Анастасия Петрова.
Points to Remember for Watercolor Painting
Watercolor Hacks for the Novice Artist
Jumping into watercolor can feel like stepping into a watercolor jungle—lots of colors, a few spills, and a handful of frustration. Fear not! Below are the golden nuggets that turn rookie blunders into dazzling masterpieces.
1. Less is More
Believe it or not, using a splash of less water than you think keeps your paint from turning into a watercolor tsunami. Modest moisture yields more control.
2. Light‑to‑Dark is the Path
Stand back, paint the sky, then the cocoa, and finally the dark shadow. Once watercolor lands, it’s like an ice‑cream sundae—no picking it back out.
3. Dry Before You Fly
Patience is your best ally. Let each layer dry fully. Adding fresh washes on a wet canvas is like a salad with muddy dressing.
4. Two Tanks, One Tactic
- Tank A: Clean water, for rinsing brushes.
- Tank B: Fresh paint, for mixing and pouring.
5. Cross‑Check Colors
Test each hue on a scrap sheet. Remember, a color behaves differently when wet than when it’s dry—think of it as a mood swing.
6. Accidental Artistry
Let those spontaneous bleeds surprise you. “Oops” can be your secret paintbrush—turns shaky lines into bold statements.
7. Paper Power
Invest in quality watercolor stock. Ordinary paper shrinks and tears when it gets wet—like a timid pop‑star at a concert.
8. Brush Brilliance
After using one color, give your brush a thorough rinse. Otherwise, colors will mingle like neighbors at a neighborhood fête.
With these simple rules, your brush strokes will rhyme, your colors will sing, and you’ll sail through the watercolor wonderland without having to scramble for help.
Bottom Line
A Fresh Start with Watercolors
Whether you’re a seasoned brush‑master or just holding that paintbrush for the first time, this little toolkit is designed to spark your imagination and make jumping into a new piece feel like a breeze. No fancy jargon or endless tutorials—just pure, playful inspiration.
What’s Inside?
- Serene Landscapes – Cool blues, soft greens, and the endless charm of nature. Think of a calming beach at sunrise or a misty mountain valley that you can paint in a single afternoon.
- Vibrant Florals – Bright bursts of color that make you smile. From wild daisies to elegant roses, these are the perfect way to practice color mixing.
- Playful Abstracts – Step outside the classic and let colors collide. Mix swirls, splats, and textures for a dynamic canvas that feels like a weather report in watercolor form.
Quick Tips for Making It Fun
- Start with a light sketch to map the composition. It’s harmless, and it keeps the brush strokes tidy.
- Layer like a culinary chef—apply a translucent wash first, then add a richer, darker layer on top to build depth.
- Let texture do the talking. Sprinkle some sponges or rags into wet paint for a subtle “grain” effect.
- Remember, mistakes are masterpieces. If you slip a splash of color into the wrong spot, embrace it and let it surprise you.
Why You’ll Love It
Watercolor offers an instant connection to the medium—soft, unpredictable, and immensely rewarding. These ideas are a gentle push that invites you to experiment, learn, and most importantly, have fun while you create. Grab a cup of tea, pull out your brushes, and let those colors dance.


